Friday Fun: Radio Controlled micro:bit Pumpkin 🎃
It's nearly Halloween!
The night when creatures of pure evil roam the land, seeking their next victim!

No brains were harmed...or found during the creation of this photo
So...
How can we scare them away?

There are lots of evil spirits in this picture, can you find them all?
Well we need to build a micro:bit powered radio controlled neopixel pumpkin!
What will you need?
- 2 x micro:bit
- 1 x Neopixel (ws2812B) 7 pixel ring
- 2 x micro USB to USB leads
- 2 x USB powerbanks (#pounderland)
- 3 x lengths of sold core wire
- 3 x M4 12mm countersunk machine screws
- 3 x M4 Nylon washers
- 3 x M4 Nylon nuts
- 3 x M4 ring terminals
- Soldering tools
- Crimping tools
- Hot Glue Gun
- A plastic pumpkin
All of the code for this project can be found on my Github repo.
Hardware
Building the GPIO expansion
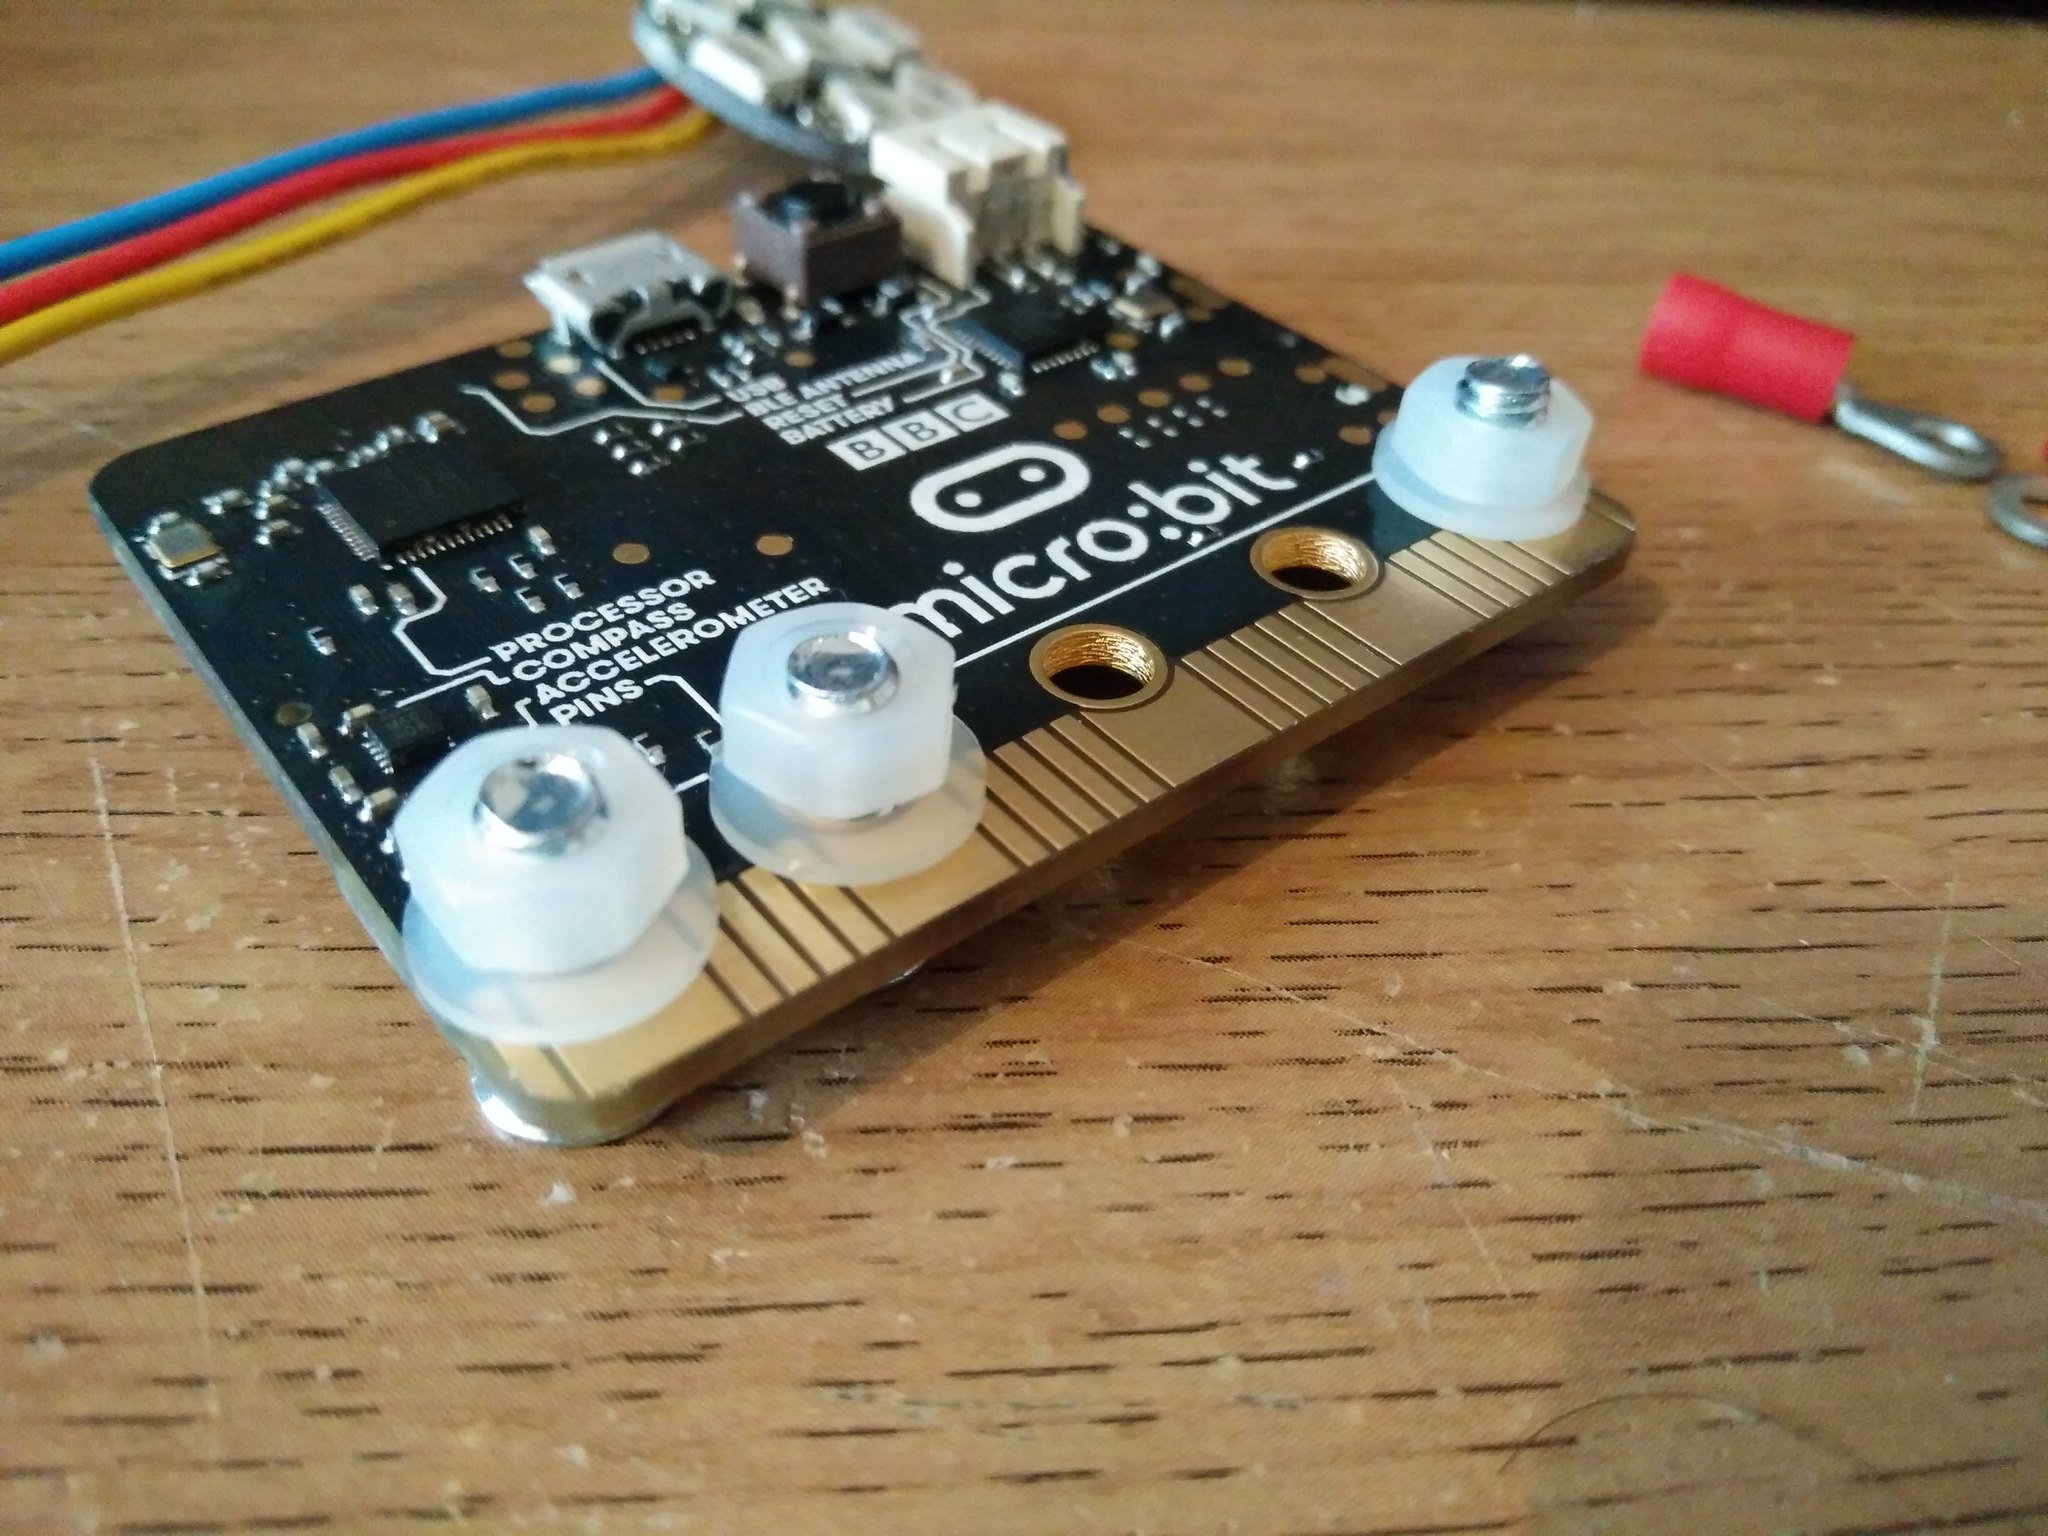
The micro:bit has a gold edge at the bottom of the board, and this is the GPIO (General Purpose Input Output) but you can see that some of these connections are broken out using holes, to which we can connect crocodile clips.
For this project we will need to insert the machine screws into pins 0, 3V and GND, then slide the washer on to each screw. Finally, lightly screw the nut to make sure that nothing goes missing.
Soldering the neopixel ring
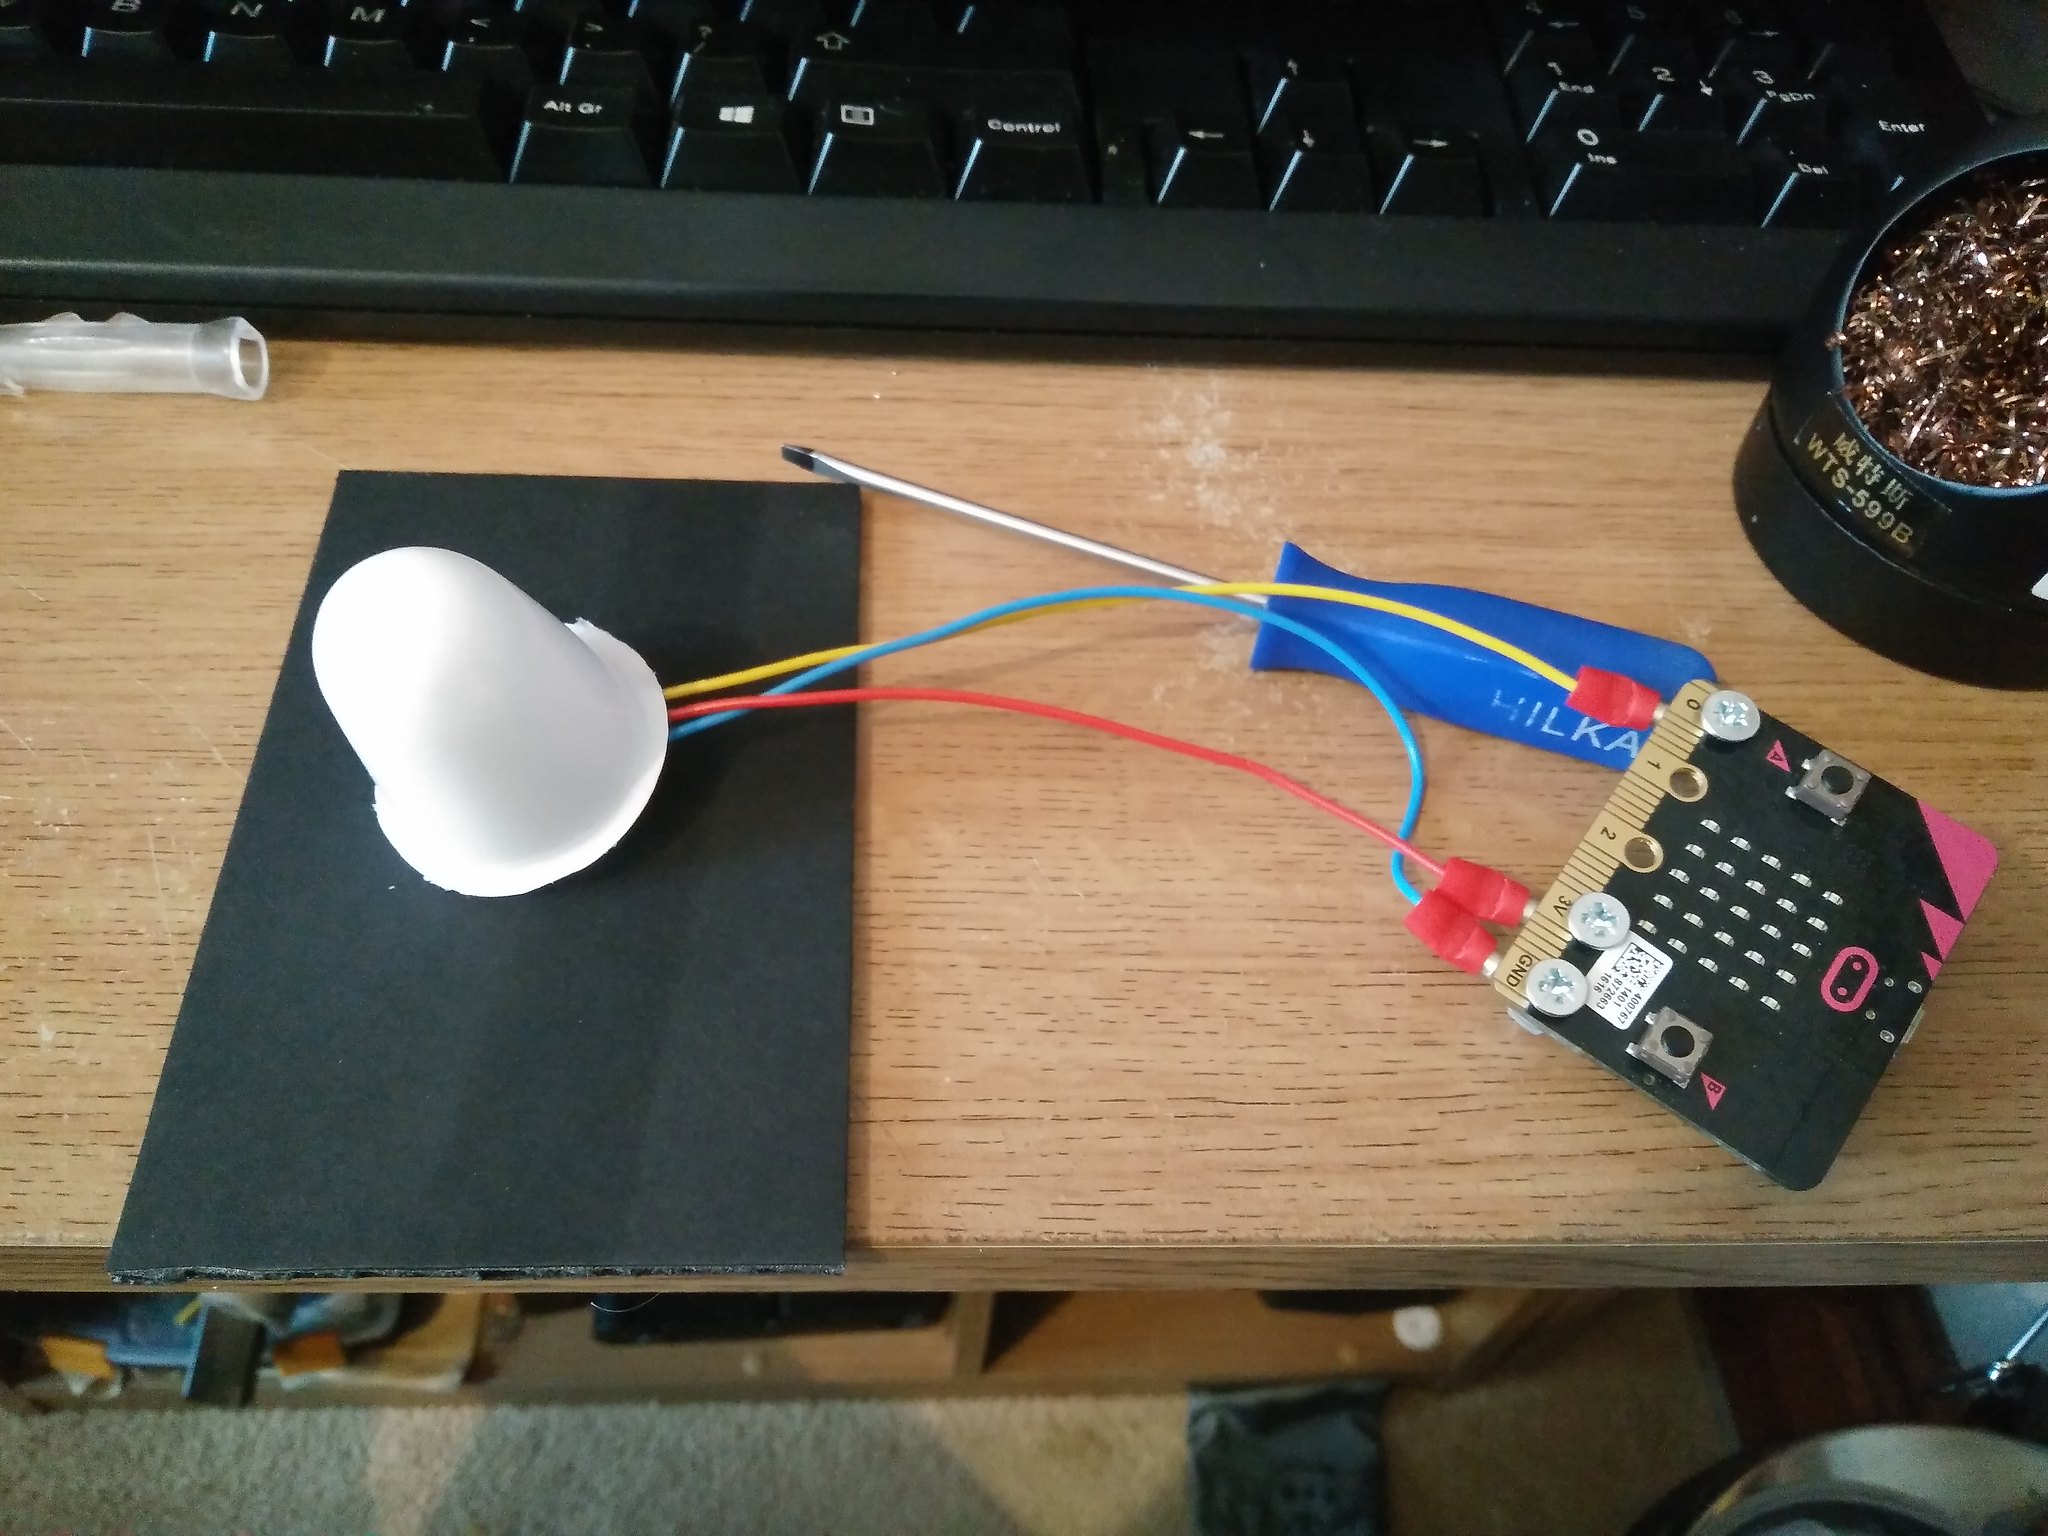
Our neopixel ring has lots of places where we can solder, but in particular we need to solder our single core wires to pins IN, PWR/VCC and GND. In the image below the wiring is as follows.
Yellow = IN
Red = VCC/PWR
Blue = GND
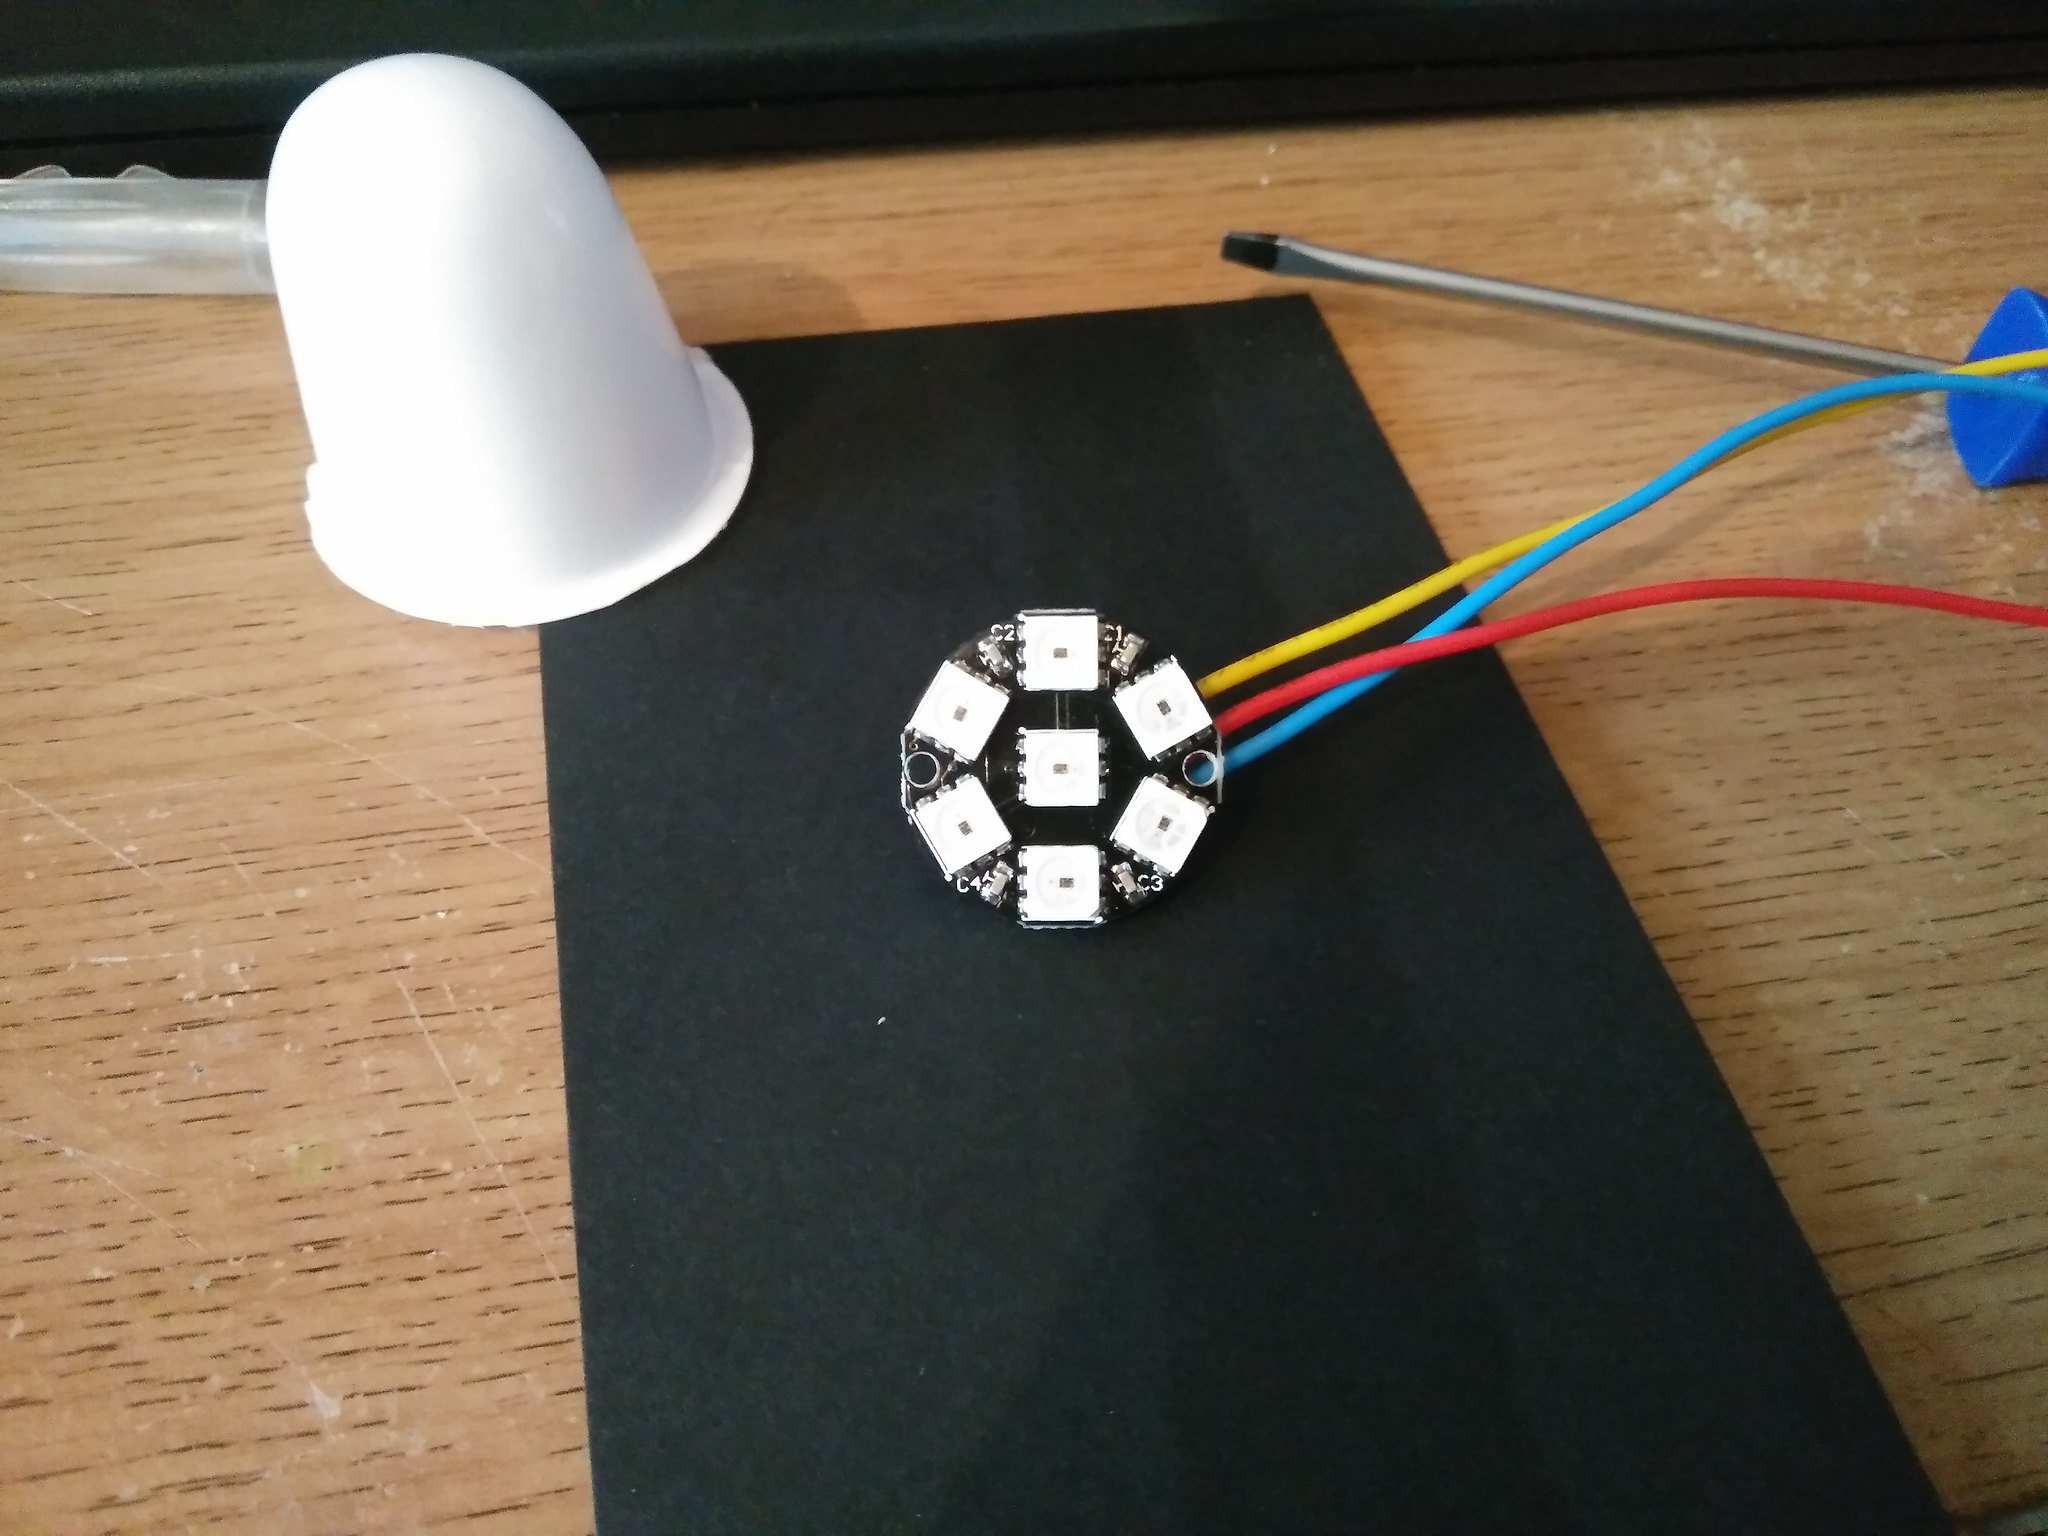
Once soldered an optional step is to apply hot glue to the connections to provide a little more strength to the joint.
Crimping the ring terminals
Strip the end of each of the 3 wires so that about 2cm of bare wire is showing. Insert the wire into the ring terminals plastic sleeve so that you can see the base metal end, then using a crimping tool apply even pressure so that the plastic is squashed around the wire. This will form a strong mechanical connection and enable the micro:bit to talk to our neopixel ring. An optional step, but you can also add a little solder to the ring terminal to ensure the wire is well connected.
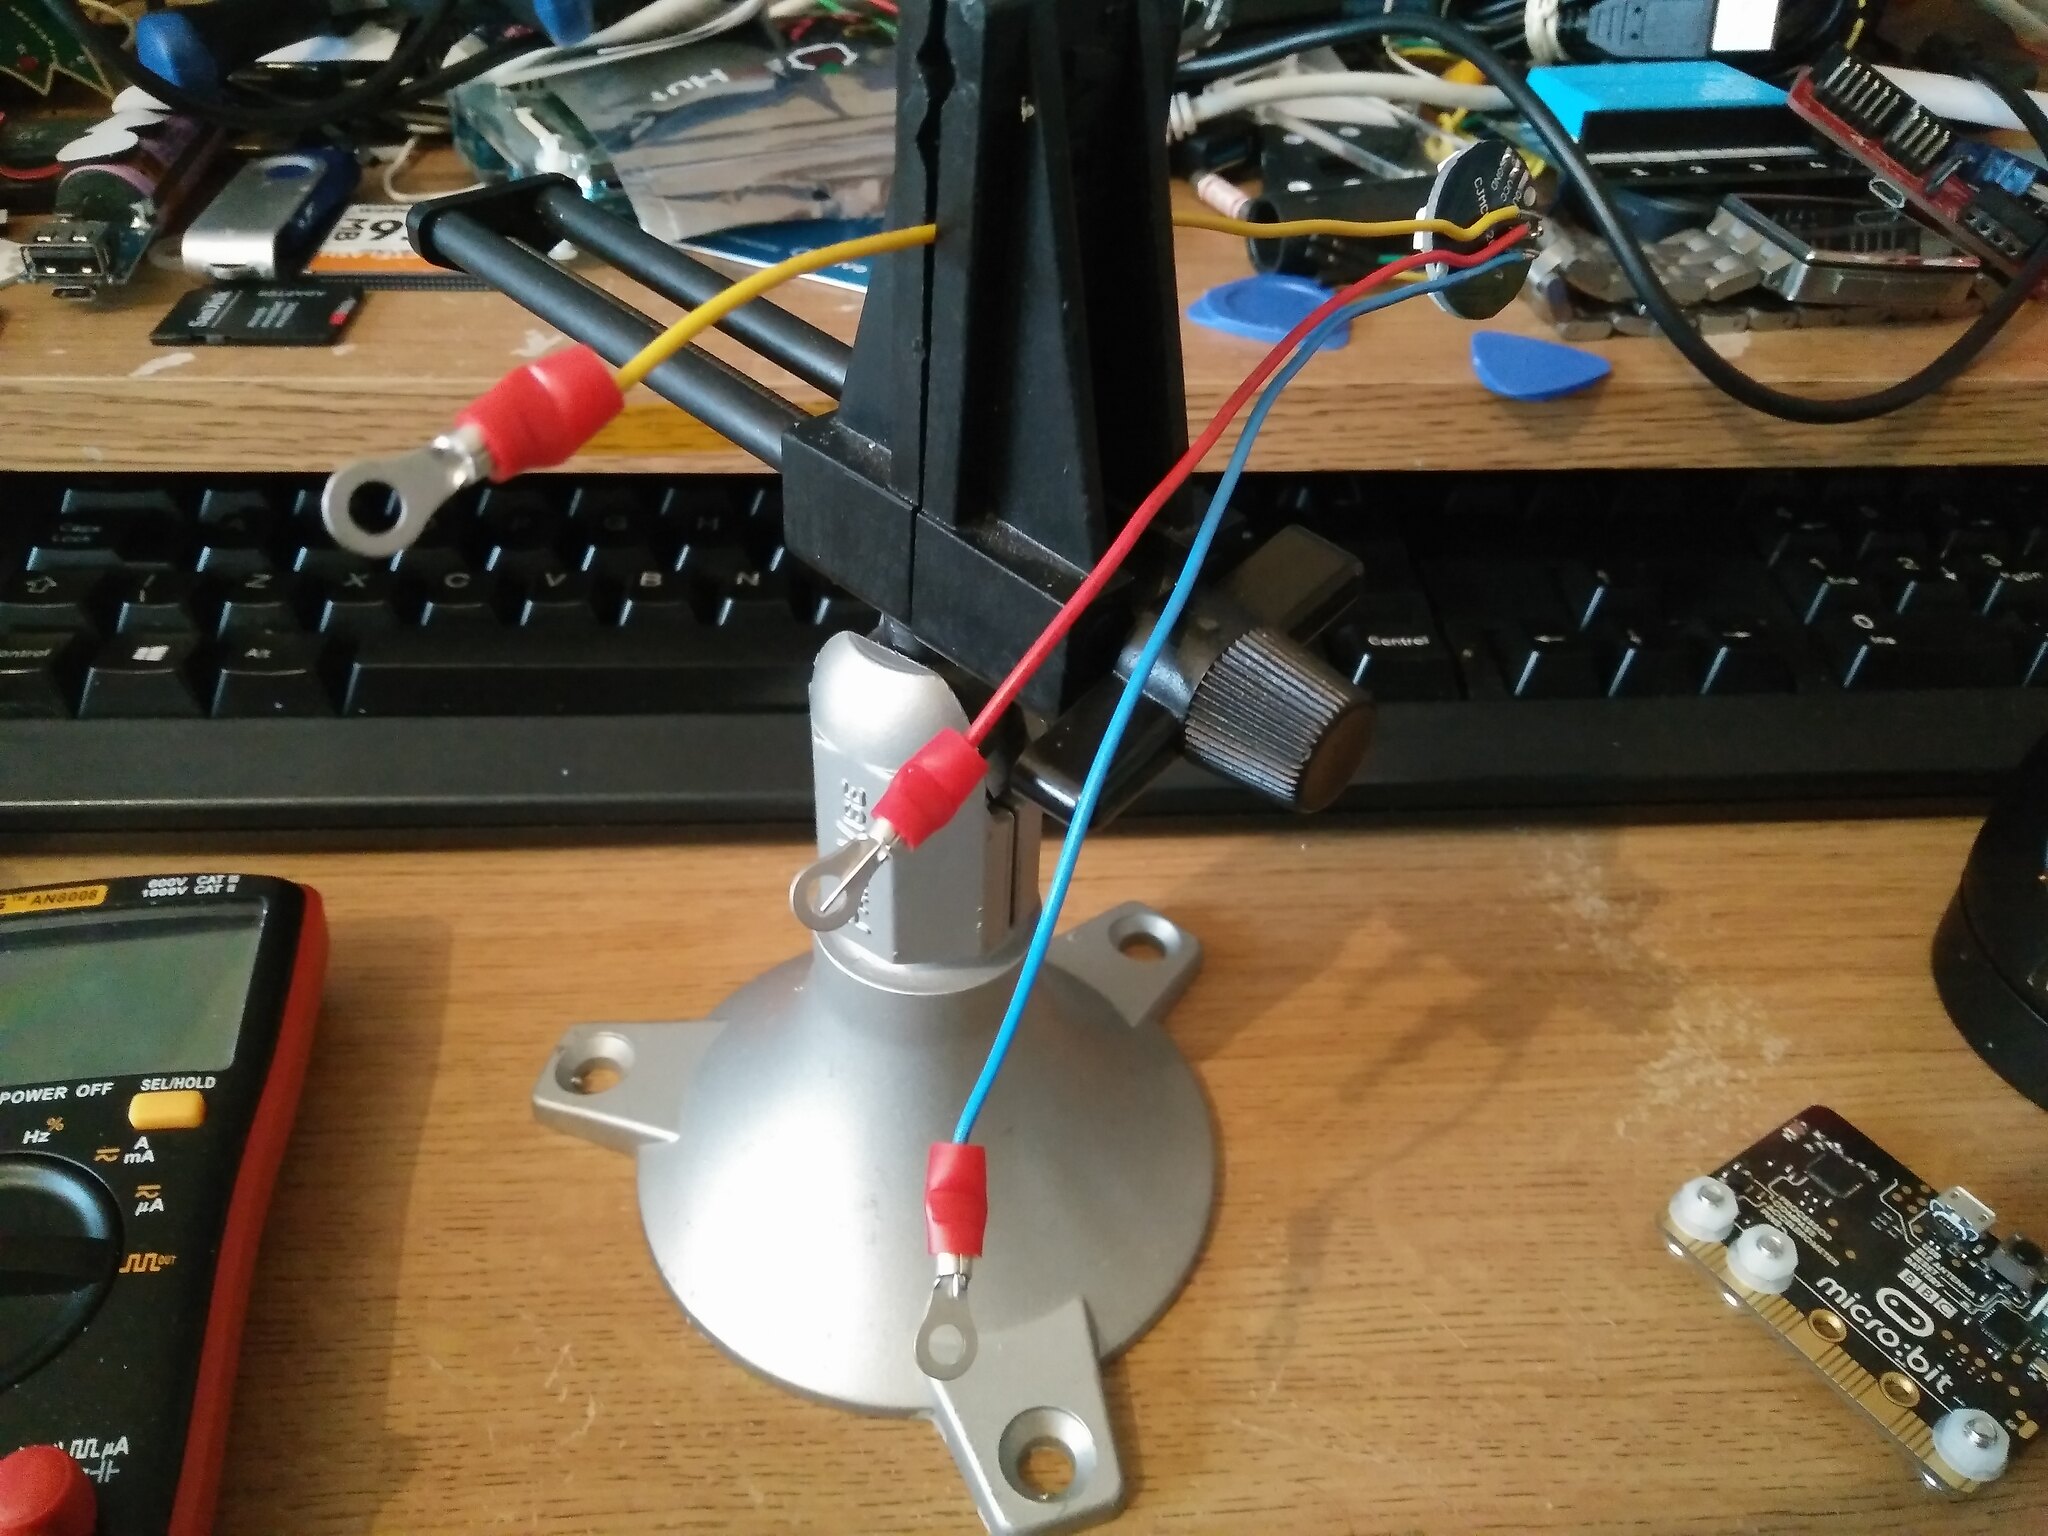
For the red wire I went a little too far, so I used my snips to trim the bare wire
Attach the ring terminals to the micro:bit
Remember those screws we inserted into the micro:bit? Well now we need to attach our neopixel ring terminals to the micro:bit GPIO.
The connections are made as follows.
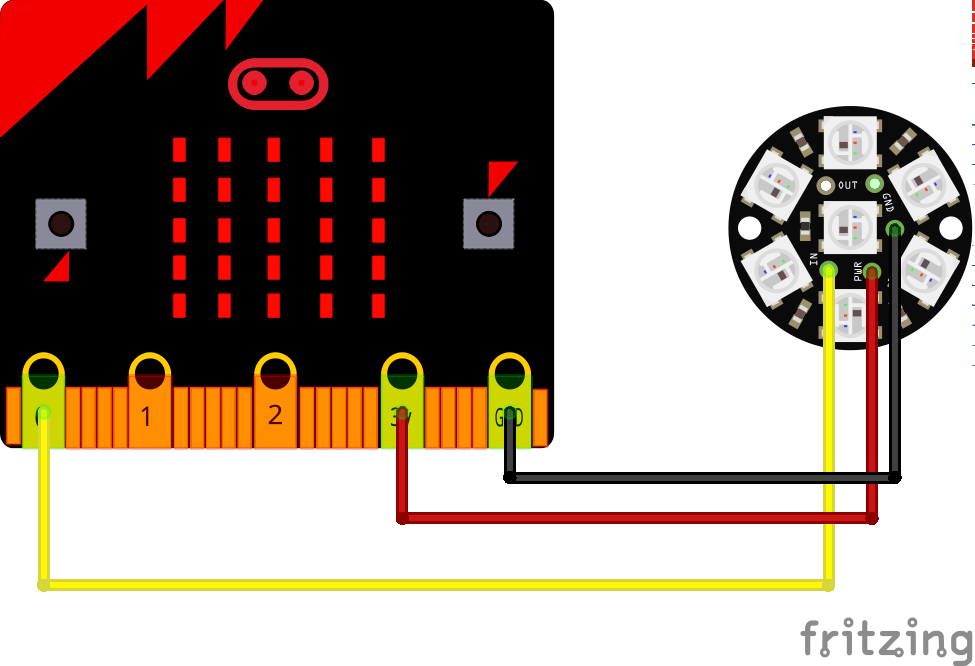
In reality they look like this.
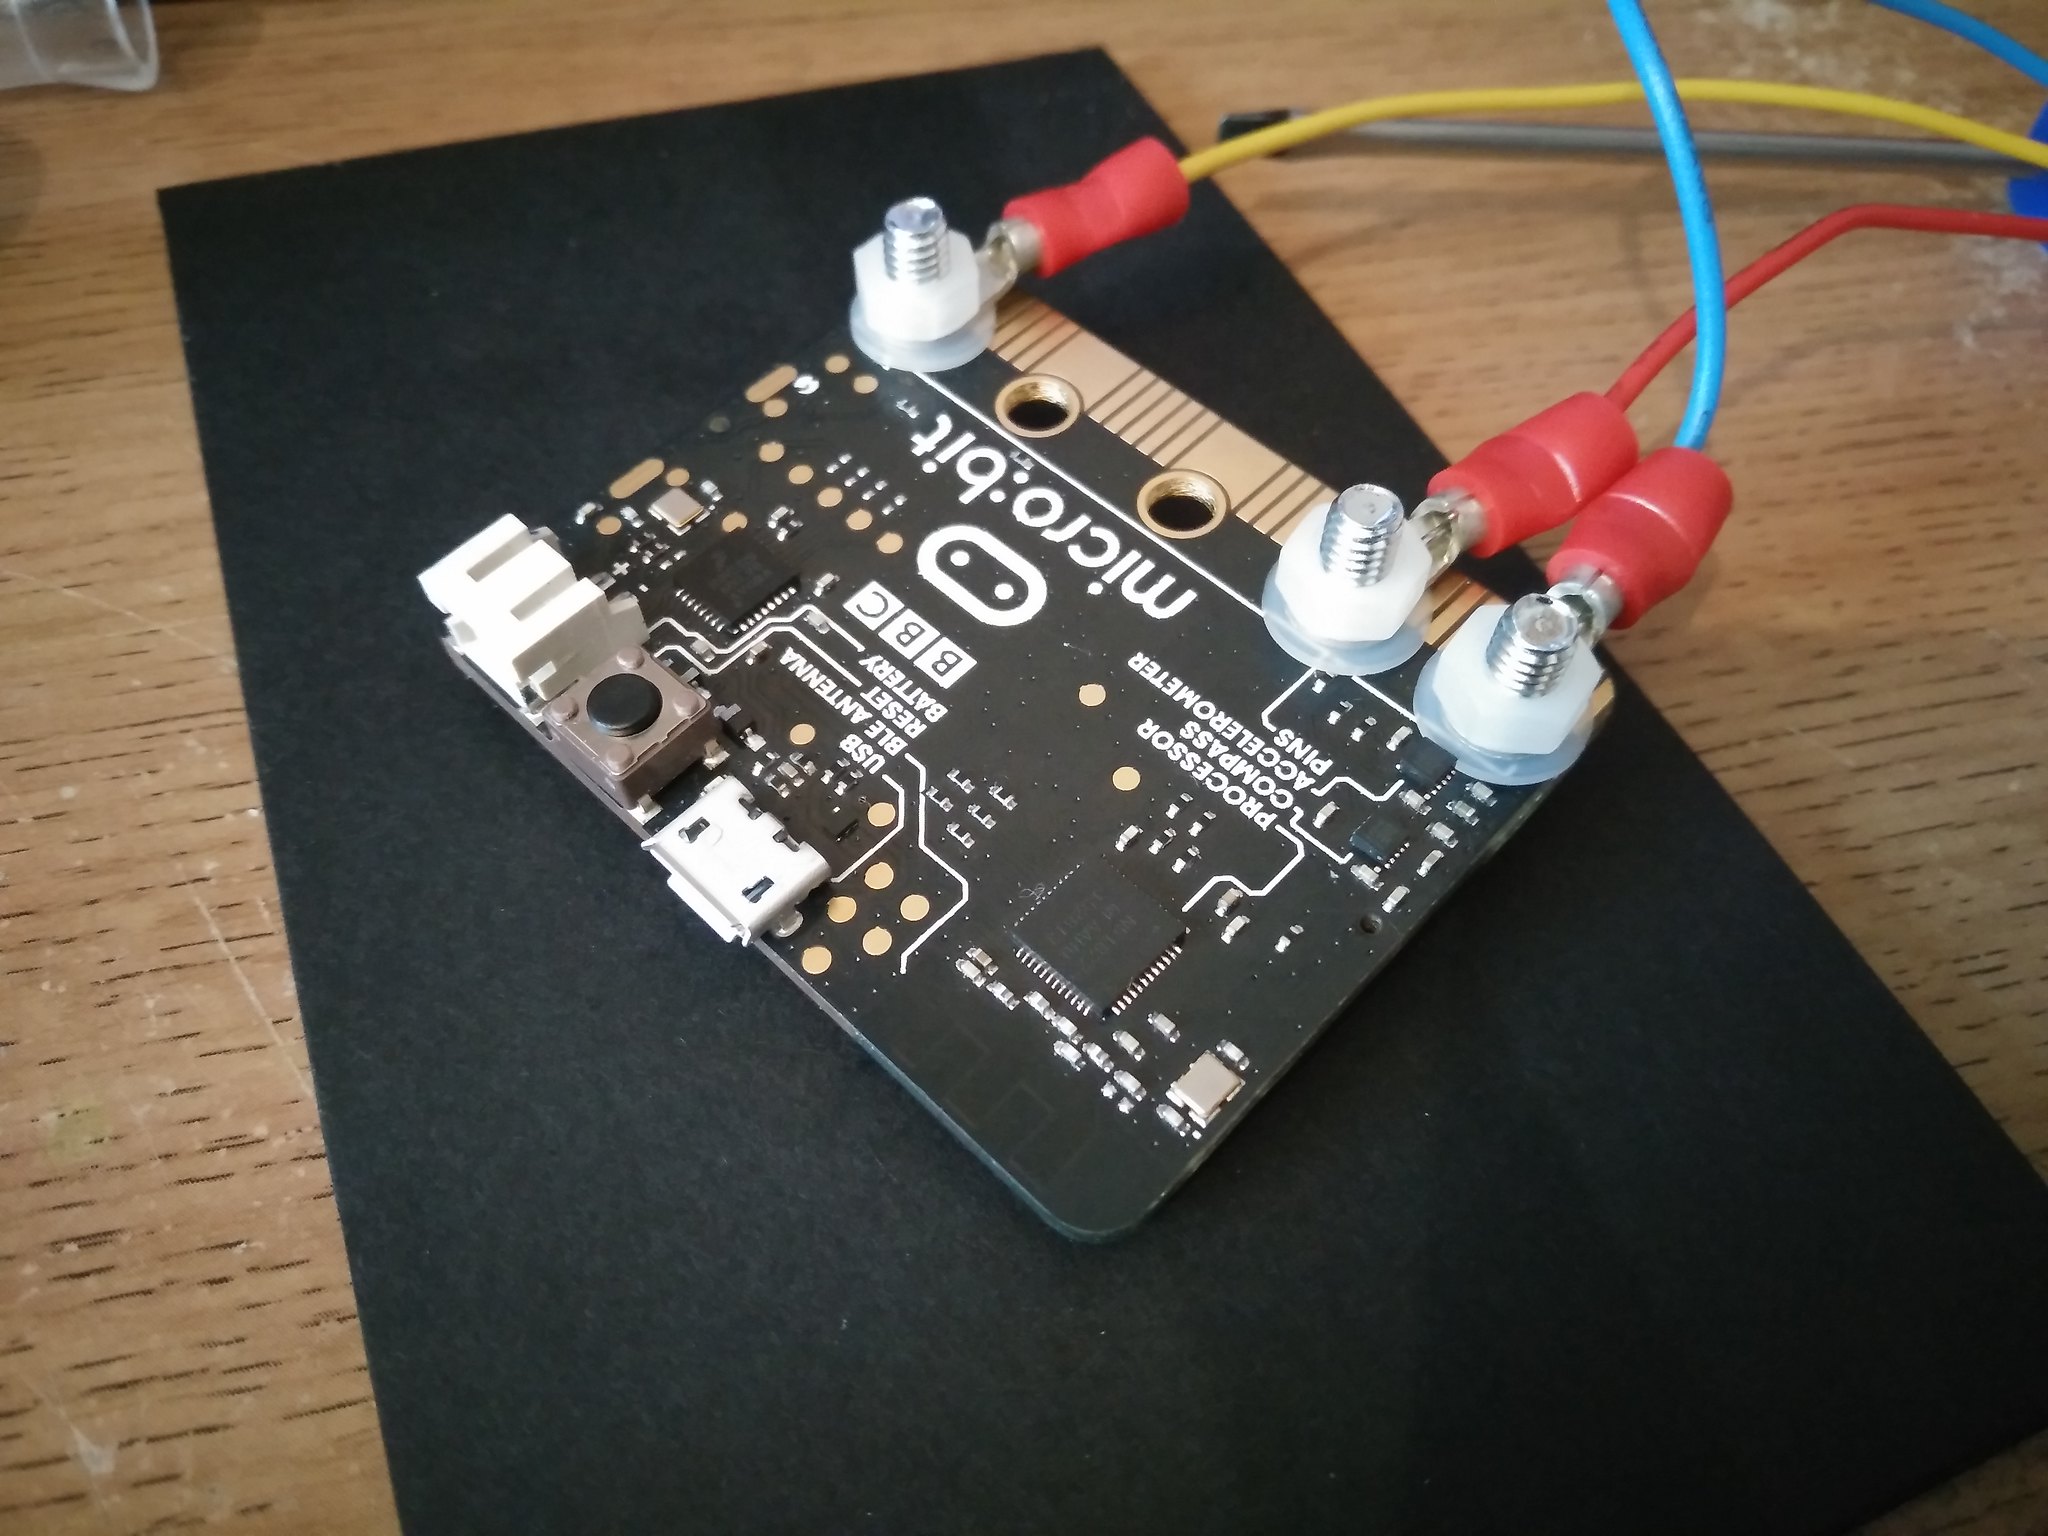
Be careful not to over tighten the machine screws as they are countersunk and can apply too much pressure on the micro:bit, causing it to crack!
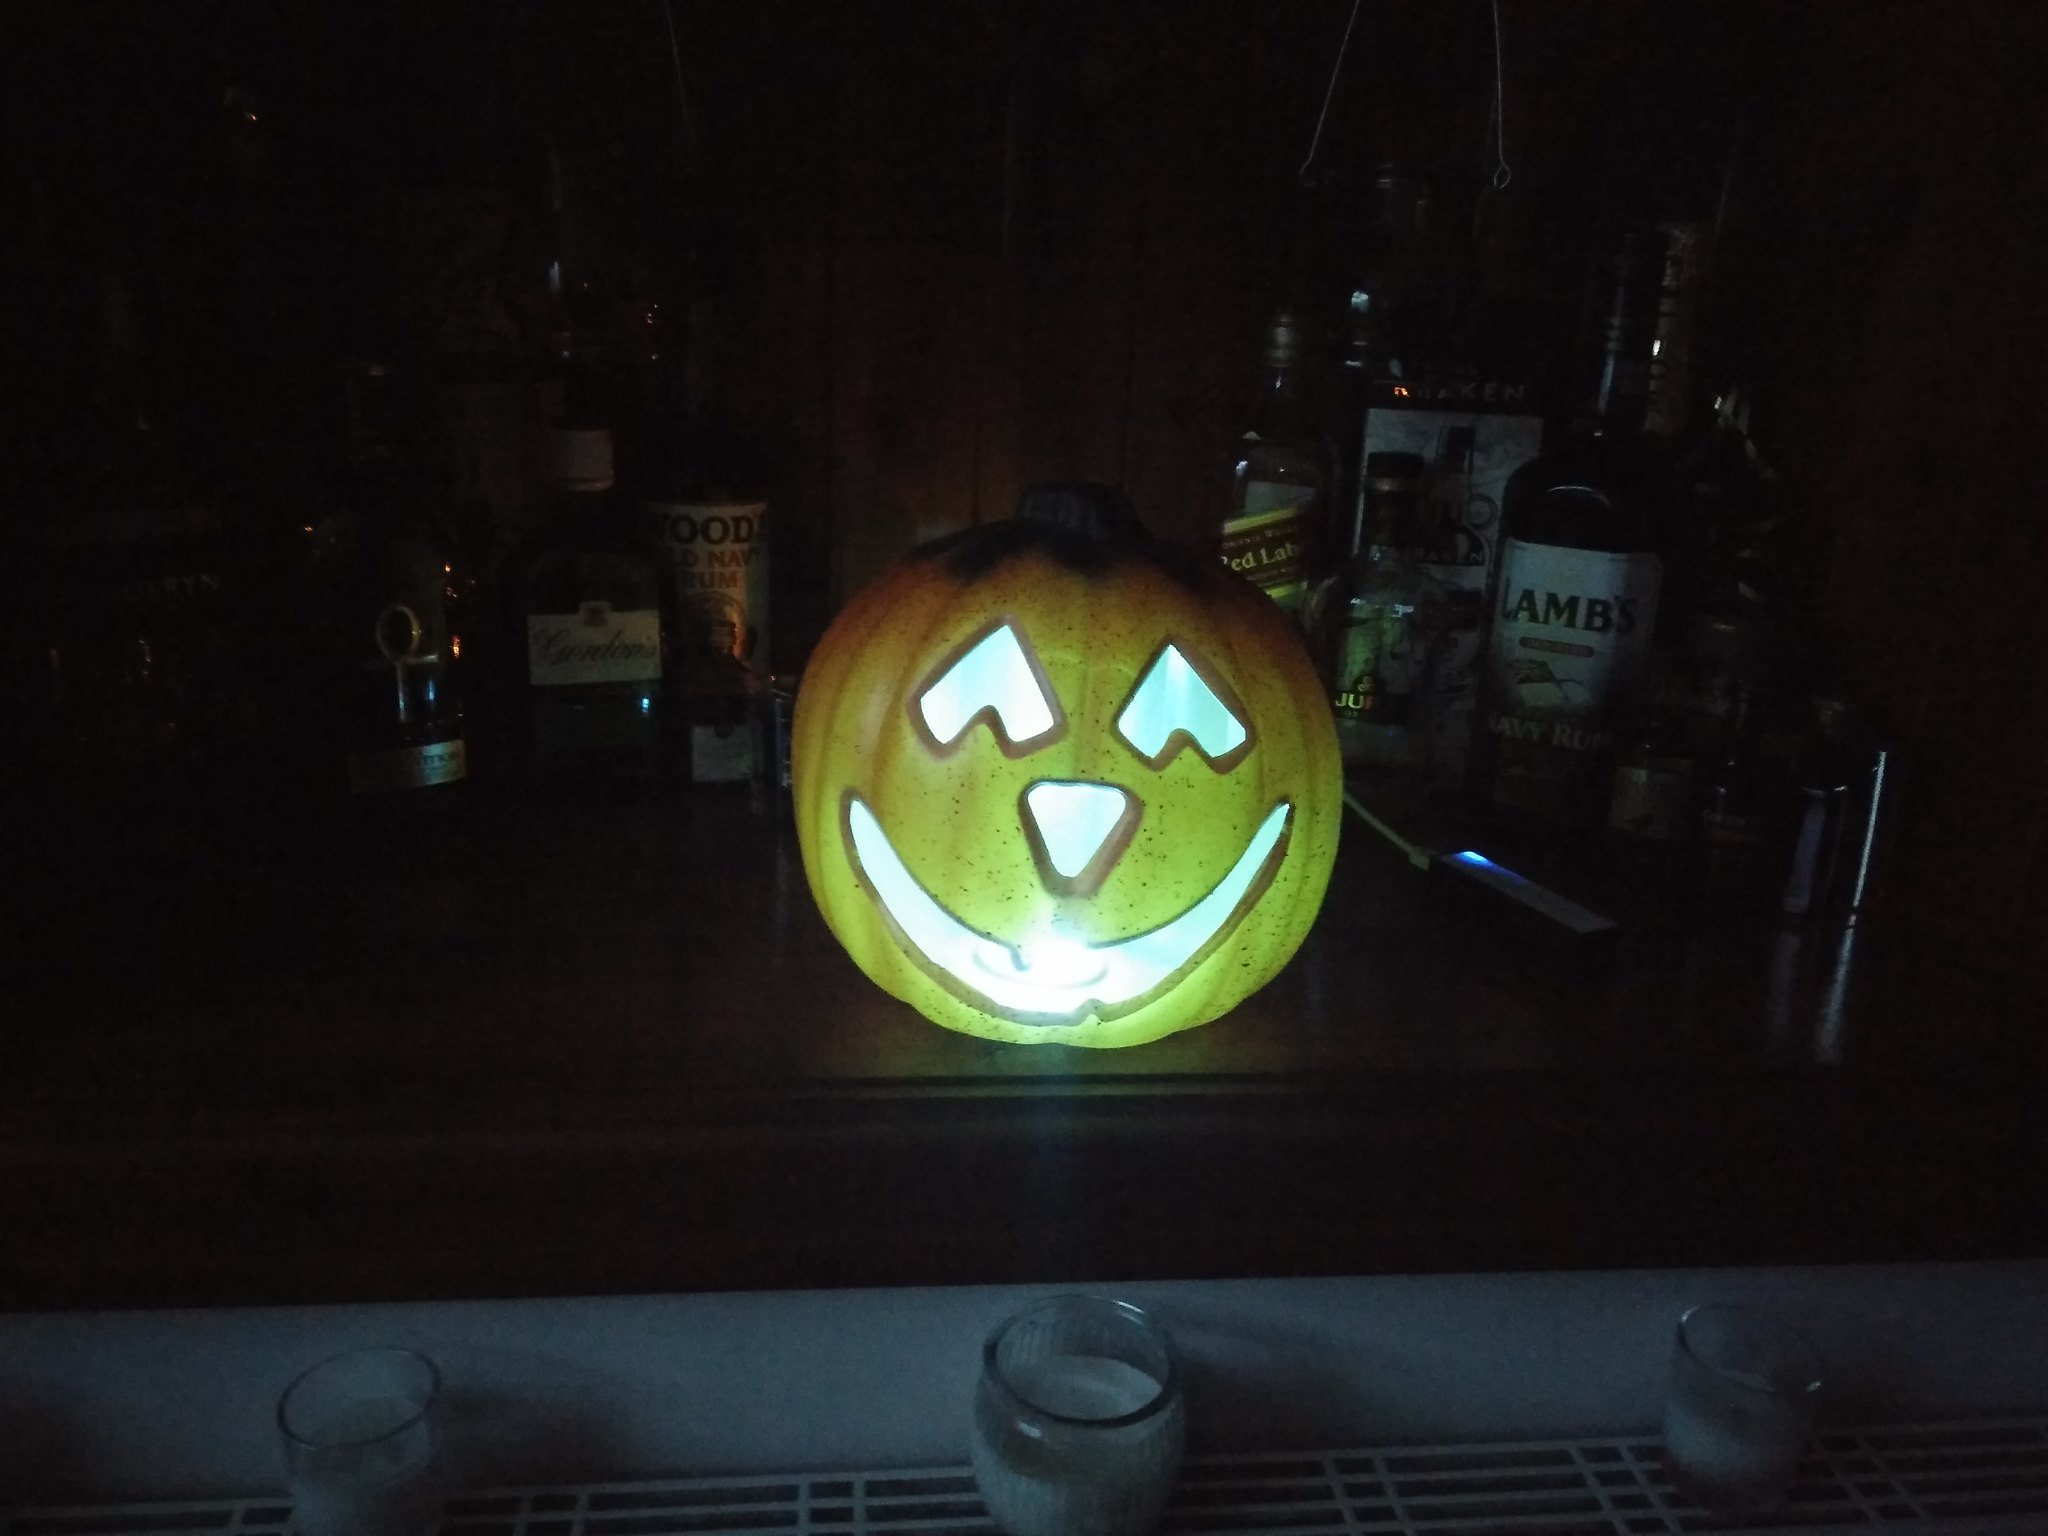
Insert the micro:bit into a plastic pumpkin
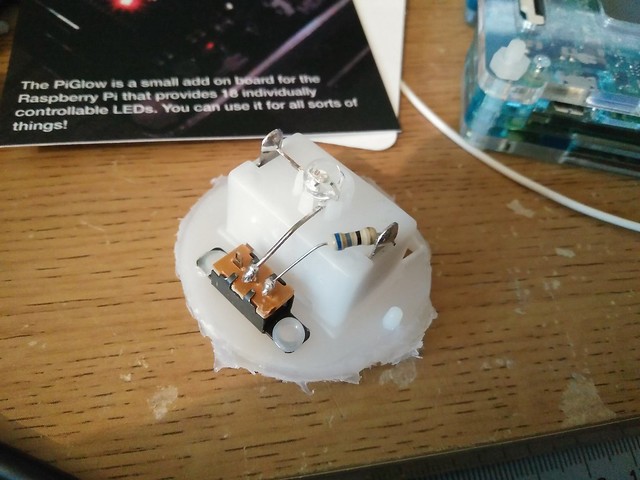
My pumpkin was from Asda, and inside the mouth is a white plastic shroud that covers an RGB LED. Flipping the pumpkin over I found a battery holder that also enabled access to the underside of the LED. Using gentle persuasion I removed the LED and battery holder and saved them for another project.
Using hot glue I stuck the neopixel ring to a piece of cardboard just a little bigger than the hole. Then I stuck the plastic shroud over the neopixel ring to diffuse the light.
This was taken before I trimmed the board down to size.
Now insert the neopixel/carboard rig into the pumpkin and use hot glue to seal it in!
Software
For the project I use Mu to write the code, but you can also use the online Python editor, and the blocks editor.
Pumpkin Code 🎃
We shall start with the software for our pumpkin. We import four libraries, the radio functionality so that we can receive messages, then the microbit library, then the sleep function and finally we import functionality for our neopixels.
import radio
from microbit import *
from microbit import sleep
import neopixel
Next we create an object that will store the pin used to connect and control our neopixel ring. We attached it to Pin 0 and there are 7 pixels in the ring, so our config is as follows.
np = neopixel.NeoPixel(pin0, 7)
Now lets turn the radio on so that our punpkin is ready to receive messages from the controller.
radio.on()
So now we create a loop that will constantly loop...forever! This is called while True (Scratch/Blocks call this Forever) and inside the loop our first task is to check that we are receiving incoming messages and to store them in a variable called incoming.
while True:
    incoming = radio.receive()
So we have a message!!!
To check that the message contains a keyword, which in this case will be face up, shake, left, right, up, down
we need to use a conditional statement test if...else if...else to check the value stored in our incoming variable against hard coded values. Let's take a look at the first as an example. If the incoming message contained face up then that is printed to the Python shell for debug (we don't see this unless we are connected to the micro:bit from our computer and using the REPL) then a for loop is used to change the colour of all 7 pixels in our neopixel ring. In this case each pixel is coloured 255,0,0 which is an RGB (Red, Green, Blue) colour value for Red on at full brightness, and Green, Blue to be off. Then in order to see the colour change we tell the neopixels to show the changenp.show() We then break out of the for loop and tell the code to wait for 0.05 seconds.
    if incoming == "face up":
        print("face up")
        for i in range(7):
            np[i] = (255,0,0)
            np.show()
        sleep(50)
We then repeat the process for each gesture using elif which is how Python identifies an else if condition to test.
Here are all the elifs
    elif incoming == "shake":
        print("shake")
        for i in range(7):
            np[i] = (255,69,0)
            np.show()
        sleep(50)
    elif incoming == "left":
        print("left")
        for i in range(7):
            np[i] = (0,255,0)
            np.show()
        sleep(50)
    elif incoming == "right":
        print("right")
        for i in range(7):
            np[i] = (255,0,255)
            np.show()
        sleep(50)
    elif incoming == "up":
        print("up")
        for i in range(7):
            np[i] = (0,191,255)
            np.show()
        sleep(50)
    elif incoming == "down":
        print("down")
        for i in range(7):
            np[i] = (124,252,0)
            np.show()
        sleep(50)
But what if the message received is not one that we expect?
If the gesture sent from the controller is not one that we wish to recognise then we use an else condition. If all of the previous if..elif conditions are proven to be False then else must be True. In this case we simply turn off the neopixels.
    else:
        for i in range(7):
            np[i] = (0,0,0)
            np.show()
        sleep(50)
That's all of the code for our Pumpkin micro:bit. Flash it on to the micro:bit and wait for the micro:bit to reset. Give it about 30 seconds and then unplug the pumpkin micro:bit from your computer and then attach it to a USB powerbank. The unit will power up and will await commands from our controller...which we shall code now!
Controller micro:bit Code
Our micro:bit controller uses gestures (moving the board around and holding it a certain way) to create the input for our pumpkin. The gesture is sent over the radio to the pumpkin which reacts accordingly.
Our first three lines of Python import the microbit library and the sleep function, used to pace our code then import the radio function used to transmit/receive messages.
from microbit import *
from microbit import sleep
import radio
Then we turn the micro:bit's built in radio on, so that we can transmit.
radio.on()
Then we create a while True loop that will constantly run the code within. In this case it constantly checks the way the micro:bit is being held / used and stores it in a variable called gesture.
while True:
    gesture = accelerometer.current_gesture()
The gesture is then checked against a series of conditions using an if...else if conditional test. If a gesture matches, then a radio message is sent to our pumpkin.
    if gesture == "face up":
        radio.send("face up")
    elif gesture == "shake":
        radio.send("shake")
    elif gesture == "left":
        radio.send("left")
    elif gesture == "right":
        radio.send("right")
    elif gesture == "up":
        radio.send("up")
    elif gesture == "down":
        radio.send("down")
Lastly we have a 0.05 seconds pause in the loop to give the micro:bit time to detect the gesture and send the message. I tried this without a sleep and the received messages on the pumpkin were often blank (NoneType errors).
sleep(50)
Flash this code on to your micro:bit and then let it reset. Give it about 30 seconds and then unplug your micro:bit from your computer and plug in the USB powerbank to your micro:bit.
Complete Code Listing
Pumpkin###
import radio
from microbit import *
from microbit import sleep
import neopixel

np = neopixel.NeoPixel(pin0, 7)

# The radio won't work unless it's switched on.
radio.on()

# Event loop.
while True:
    incoming = radio.receive()
    if incoming == "face up":
        print("face up")
        for i in range(7):
            np[i] = (255,0,0)
            np.show()
        sleep(50)
    elif incoming == "shake":
        print("shake")
        for i in range(7):
            np[i] = (255,69,0)
            np.show()
        sleep(50)
    elif incoming == "left":
        print("left")
        for i in range(7):
            np[i] = (0,255,0)
            np.show()
        sleep(50)
    elif incoming == "right":
        print("right")
        for i in range(7):
            np[i] = (255,0,255)
            np.show()
        sleep(50)
    elif incoming == "up":
        print("up")
        for i in range(7):
            np[i] = (0,191,255)
            np.show()
        sleep(50)
    elif incoming == "down":
        print("down")
        for i in range(7):
            np[i] = (124,252,0)
            np.show()
        sleep(50)
    else:
        for i in range(7):
            np[i] = (0,0,0)
            np.show()
        sleep(50)

    #if incoming == 'flash':
    #    print("Hello")
Controller
from microbit import *
from microbit import sleep
import radio
# The radio won't work unless it's switched on.
radio.on()
while True:
    gesture = accelerometer.current_gesture()
    if gesture == "face up":
        radio.send("face up")
    elif gesture == "shake":
        radio.send("shake")
    elif gesture == "left":
        radio.send("left")
    elif gesture == "right":
        radio.send("right")
    elif gesture == "up":
        radio.send("up")
    elif gesture == "down":
        radio.send("down")
    sleep(50)