Friday Fun: Hacking a Toy Car With 4Duino
Disclaimer: These boards were provided by 4tronix for the purpose of the blog post. This isn't a "review" as such, but you can be assured that the comments that I make are not influenced in any way. I will point out the good and bad openly and fairly.
First Steps
When I took my first tentative steps in to the world of being a maker, my first board was an Arduino Uno (Rev 2). I'll be honest, when I first used the board I didn't "get it" whatever "it" was. It was fun but I didn't see a point. Well I was quite wrong, wasn't I dear reader?!
The Arduino is an absolutely incredible board to use, it gives instant results and it has a community of makers and resources behind it. Now that I am a more "seasoned" maker I see how important the Arduino is to the community.
Just recently Gareth from 4Tronix sent me a care package, and in that package were two Arduino "clone" boards called 4duino.
4duino?
4tronix have created their own series of boards, 4duino that offer Arduino compatibility, in their software and physical layout, and two of the series caught my eye, and these were the Pro range.
Pro?
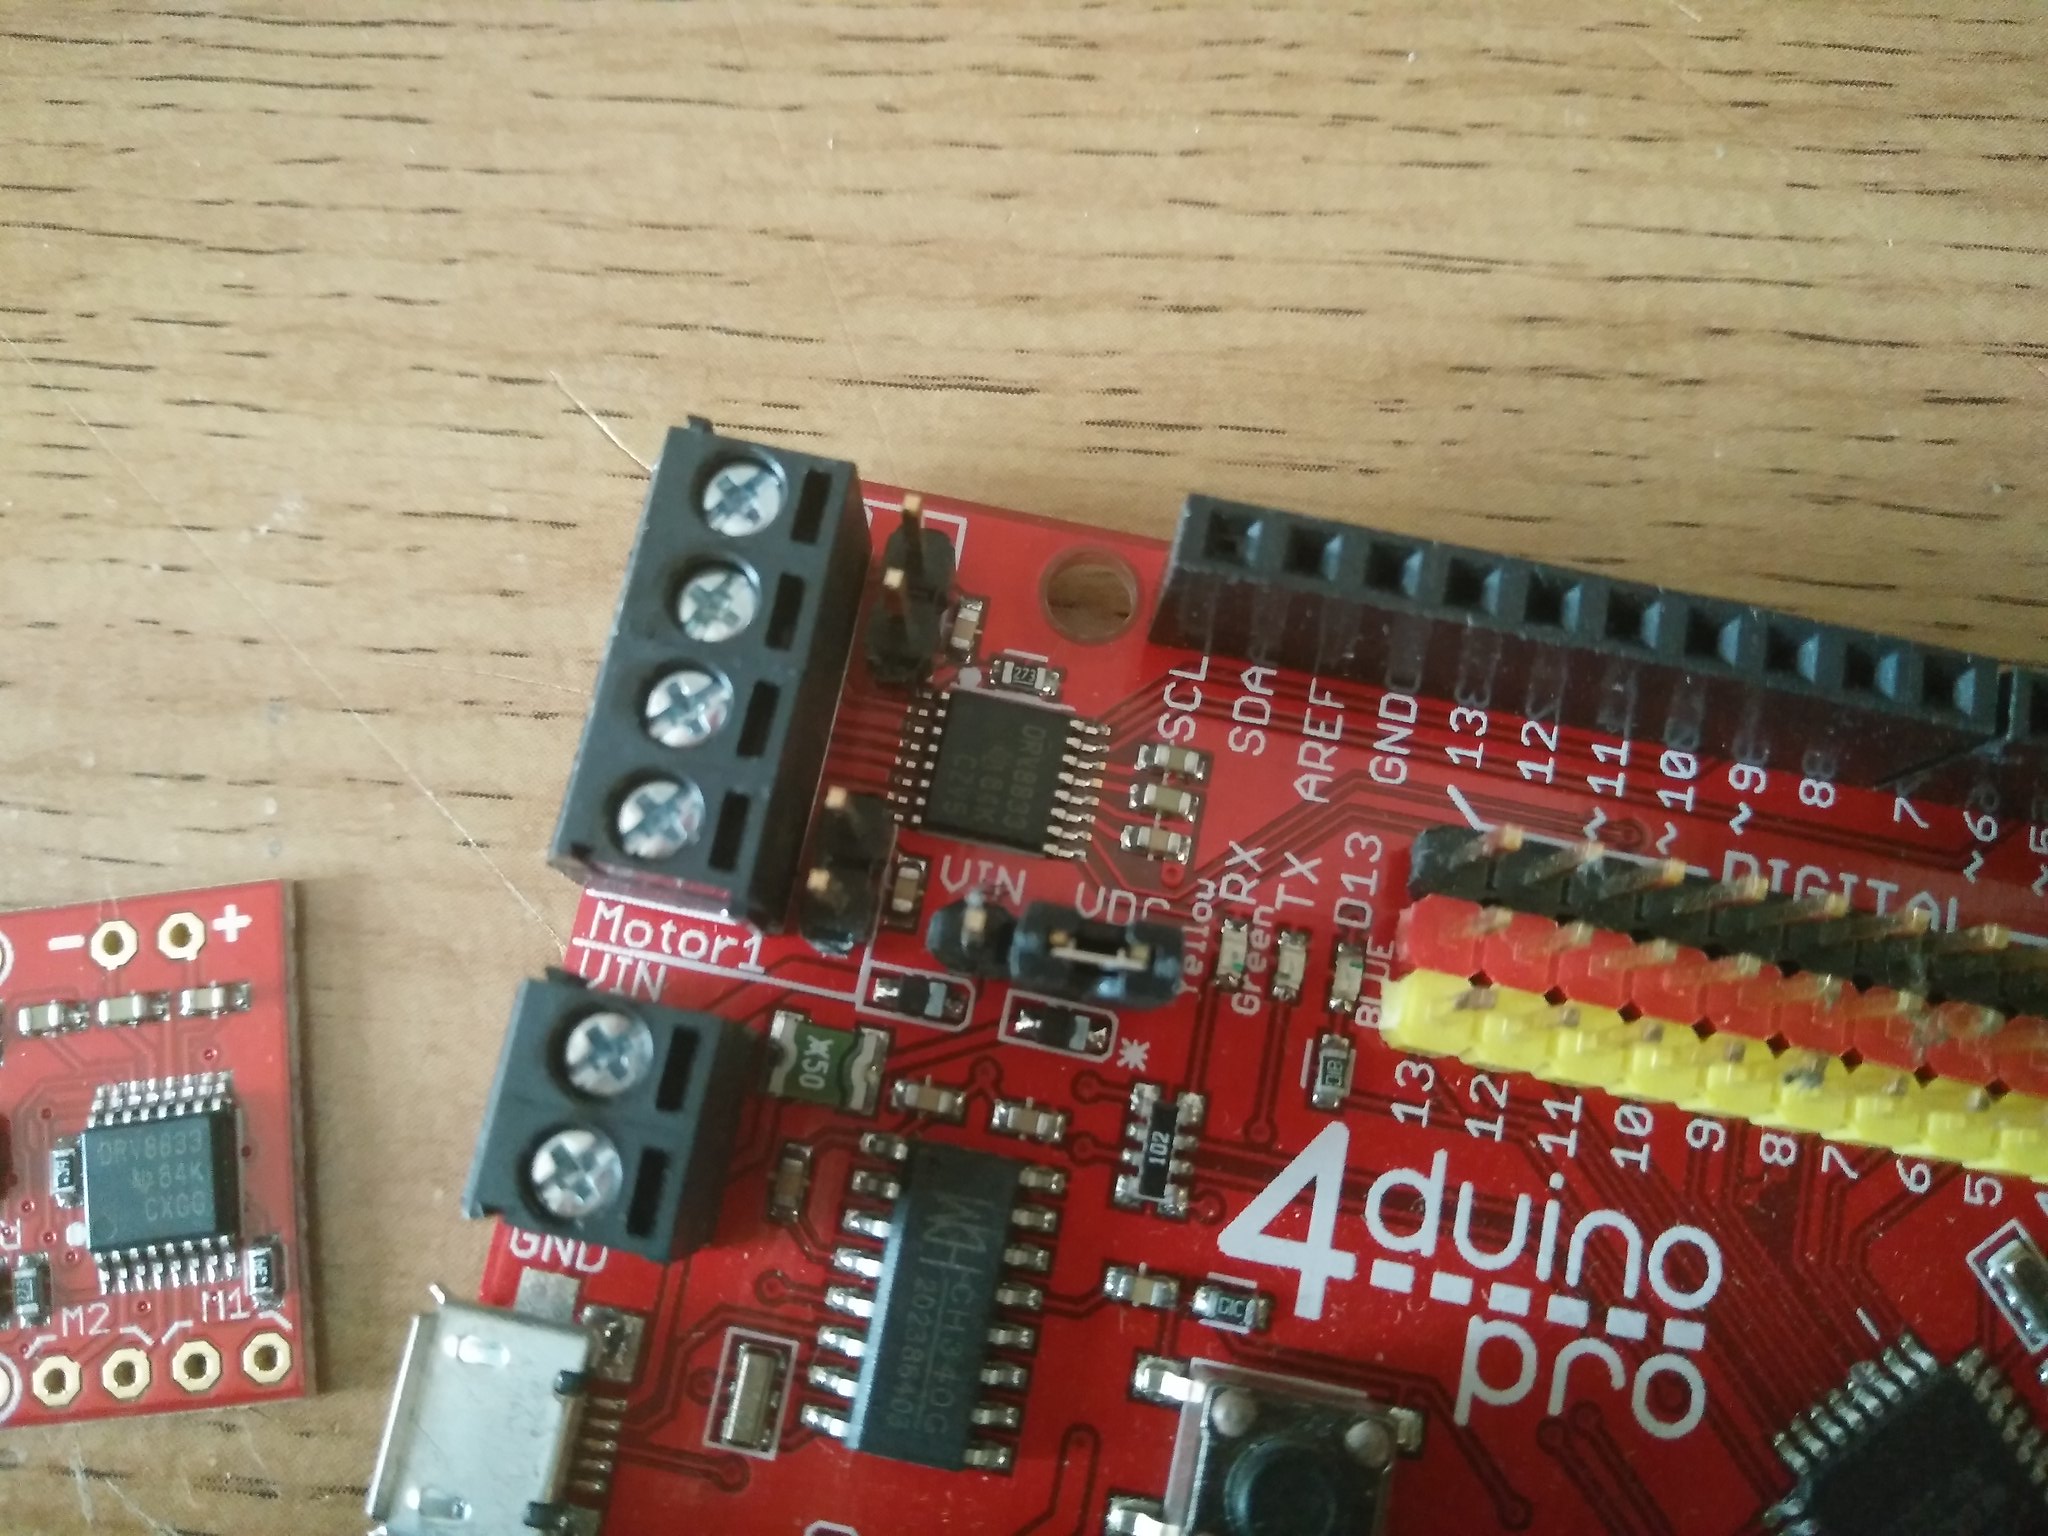
The 4duino pro offer a little something extra, a built in DRV8833 motor controller...yes you read that right, these 4duino boards come with their own motor controllers so it is super simple to build moving projects / robots / motorised pizza cutters. (Picademy joke)
Quick look around the boards
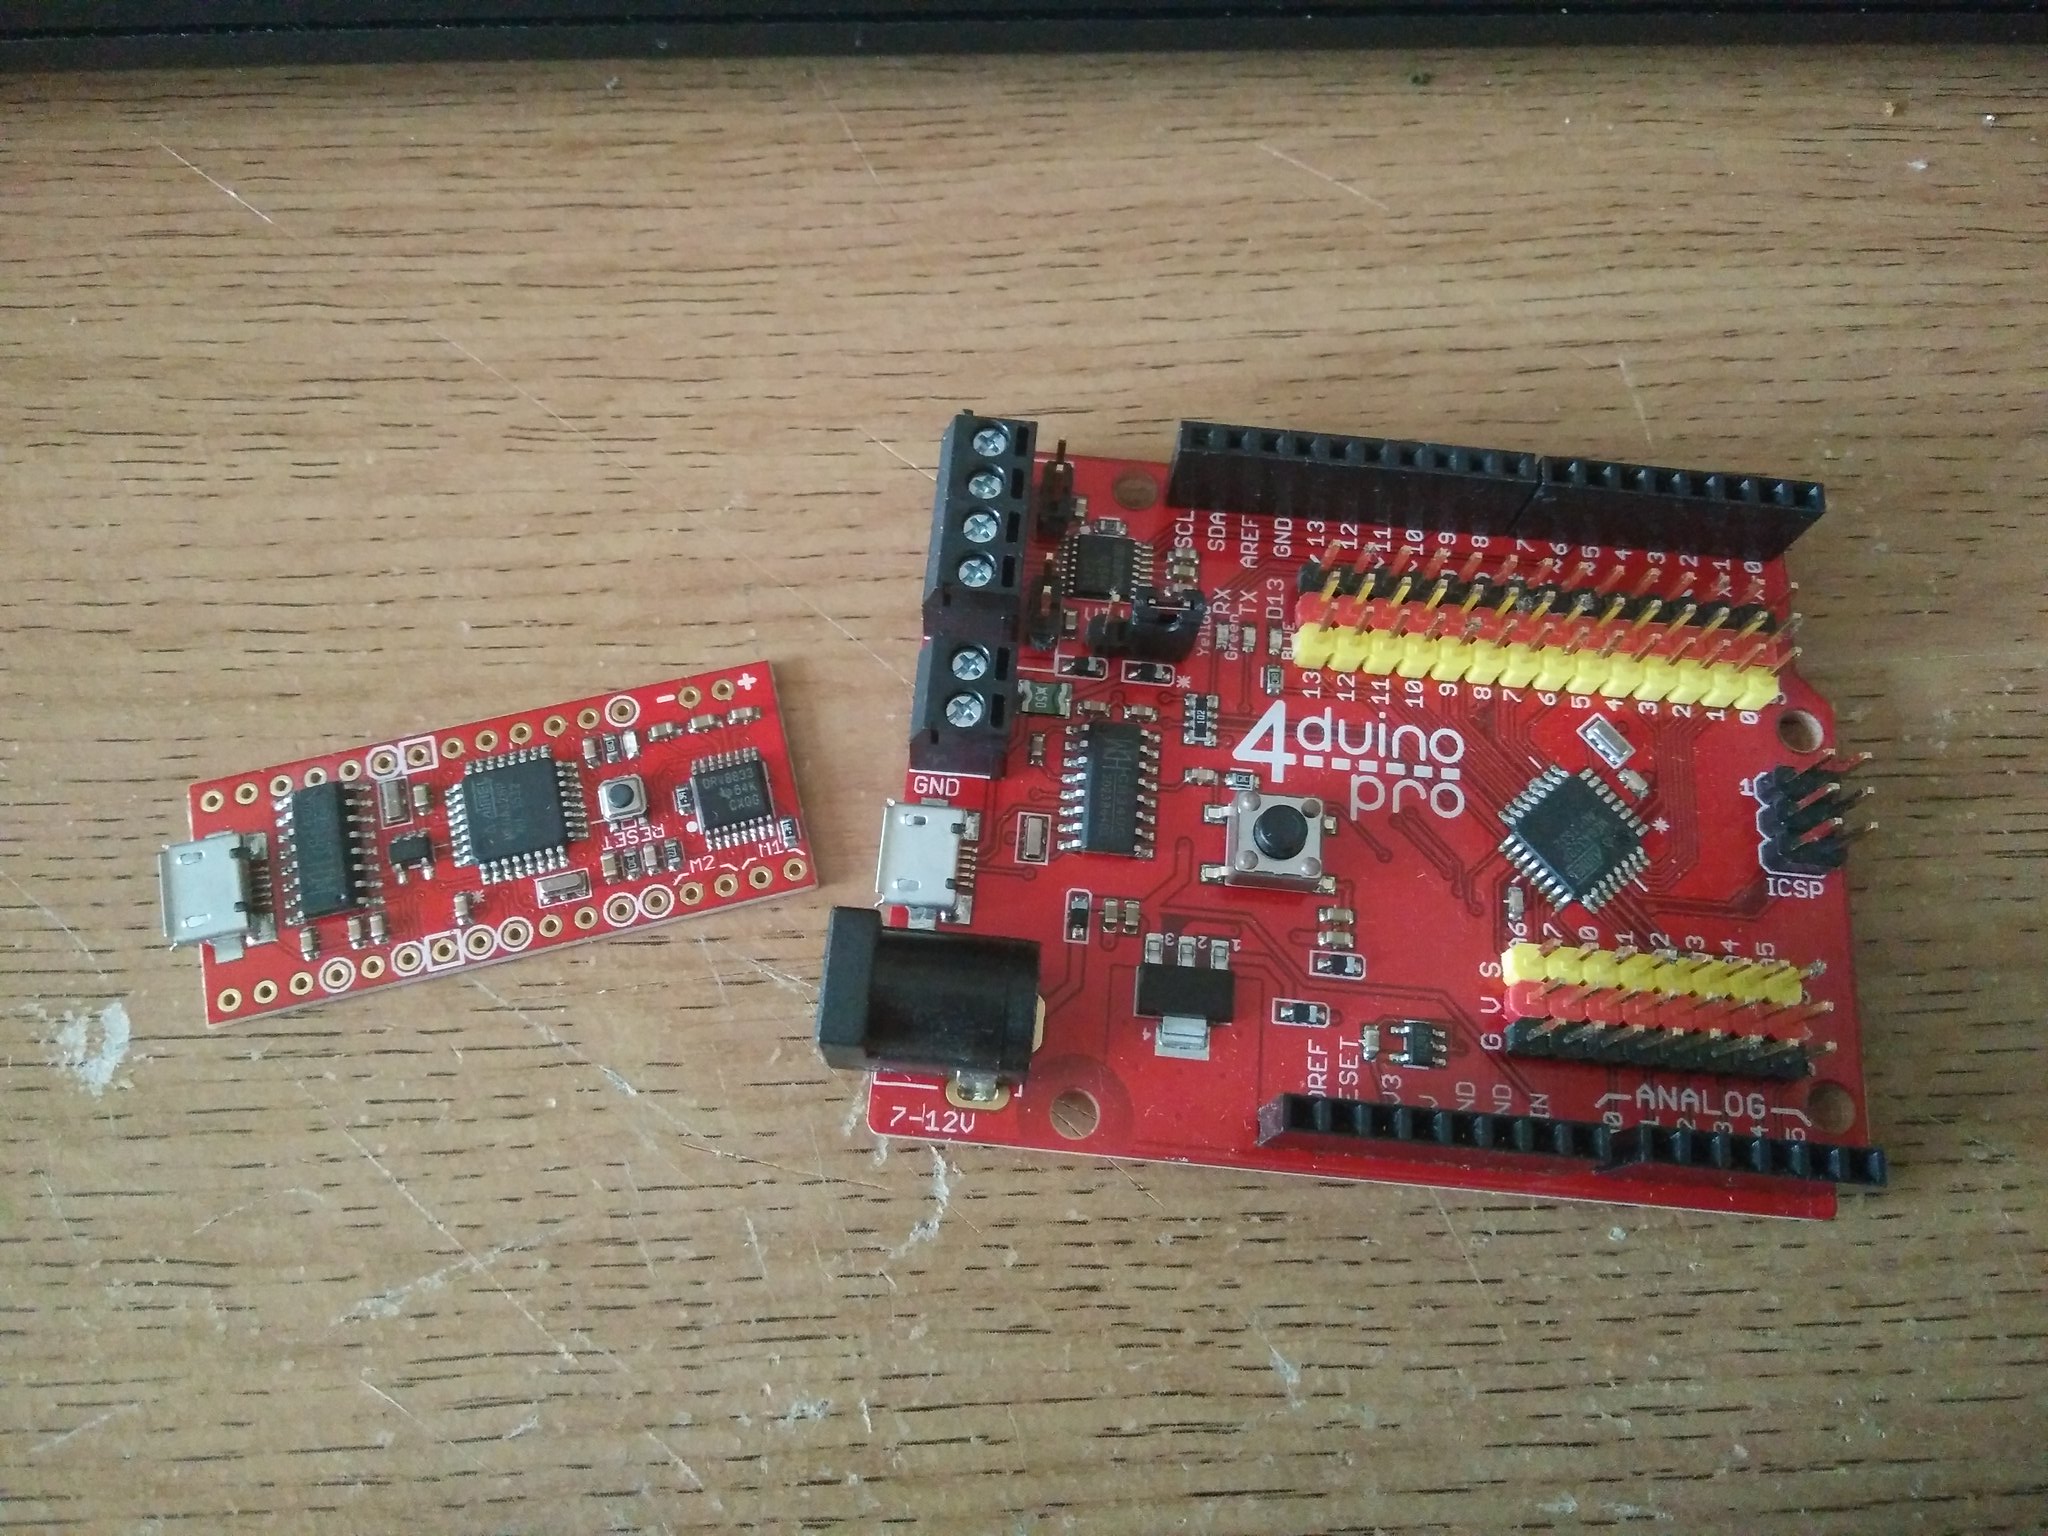
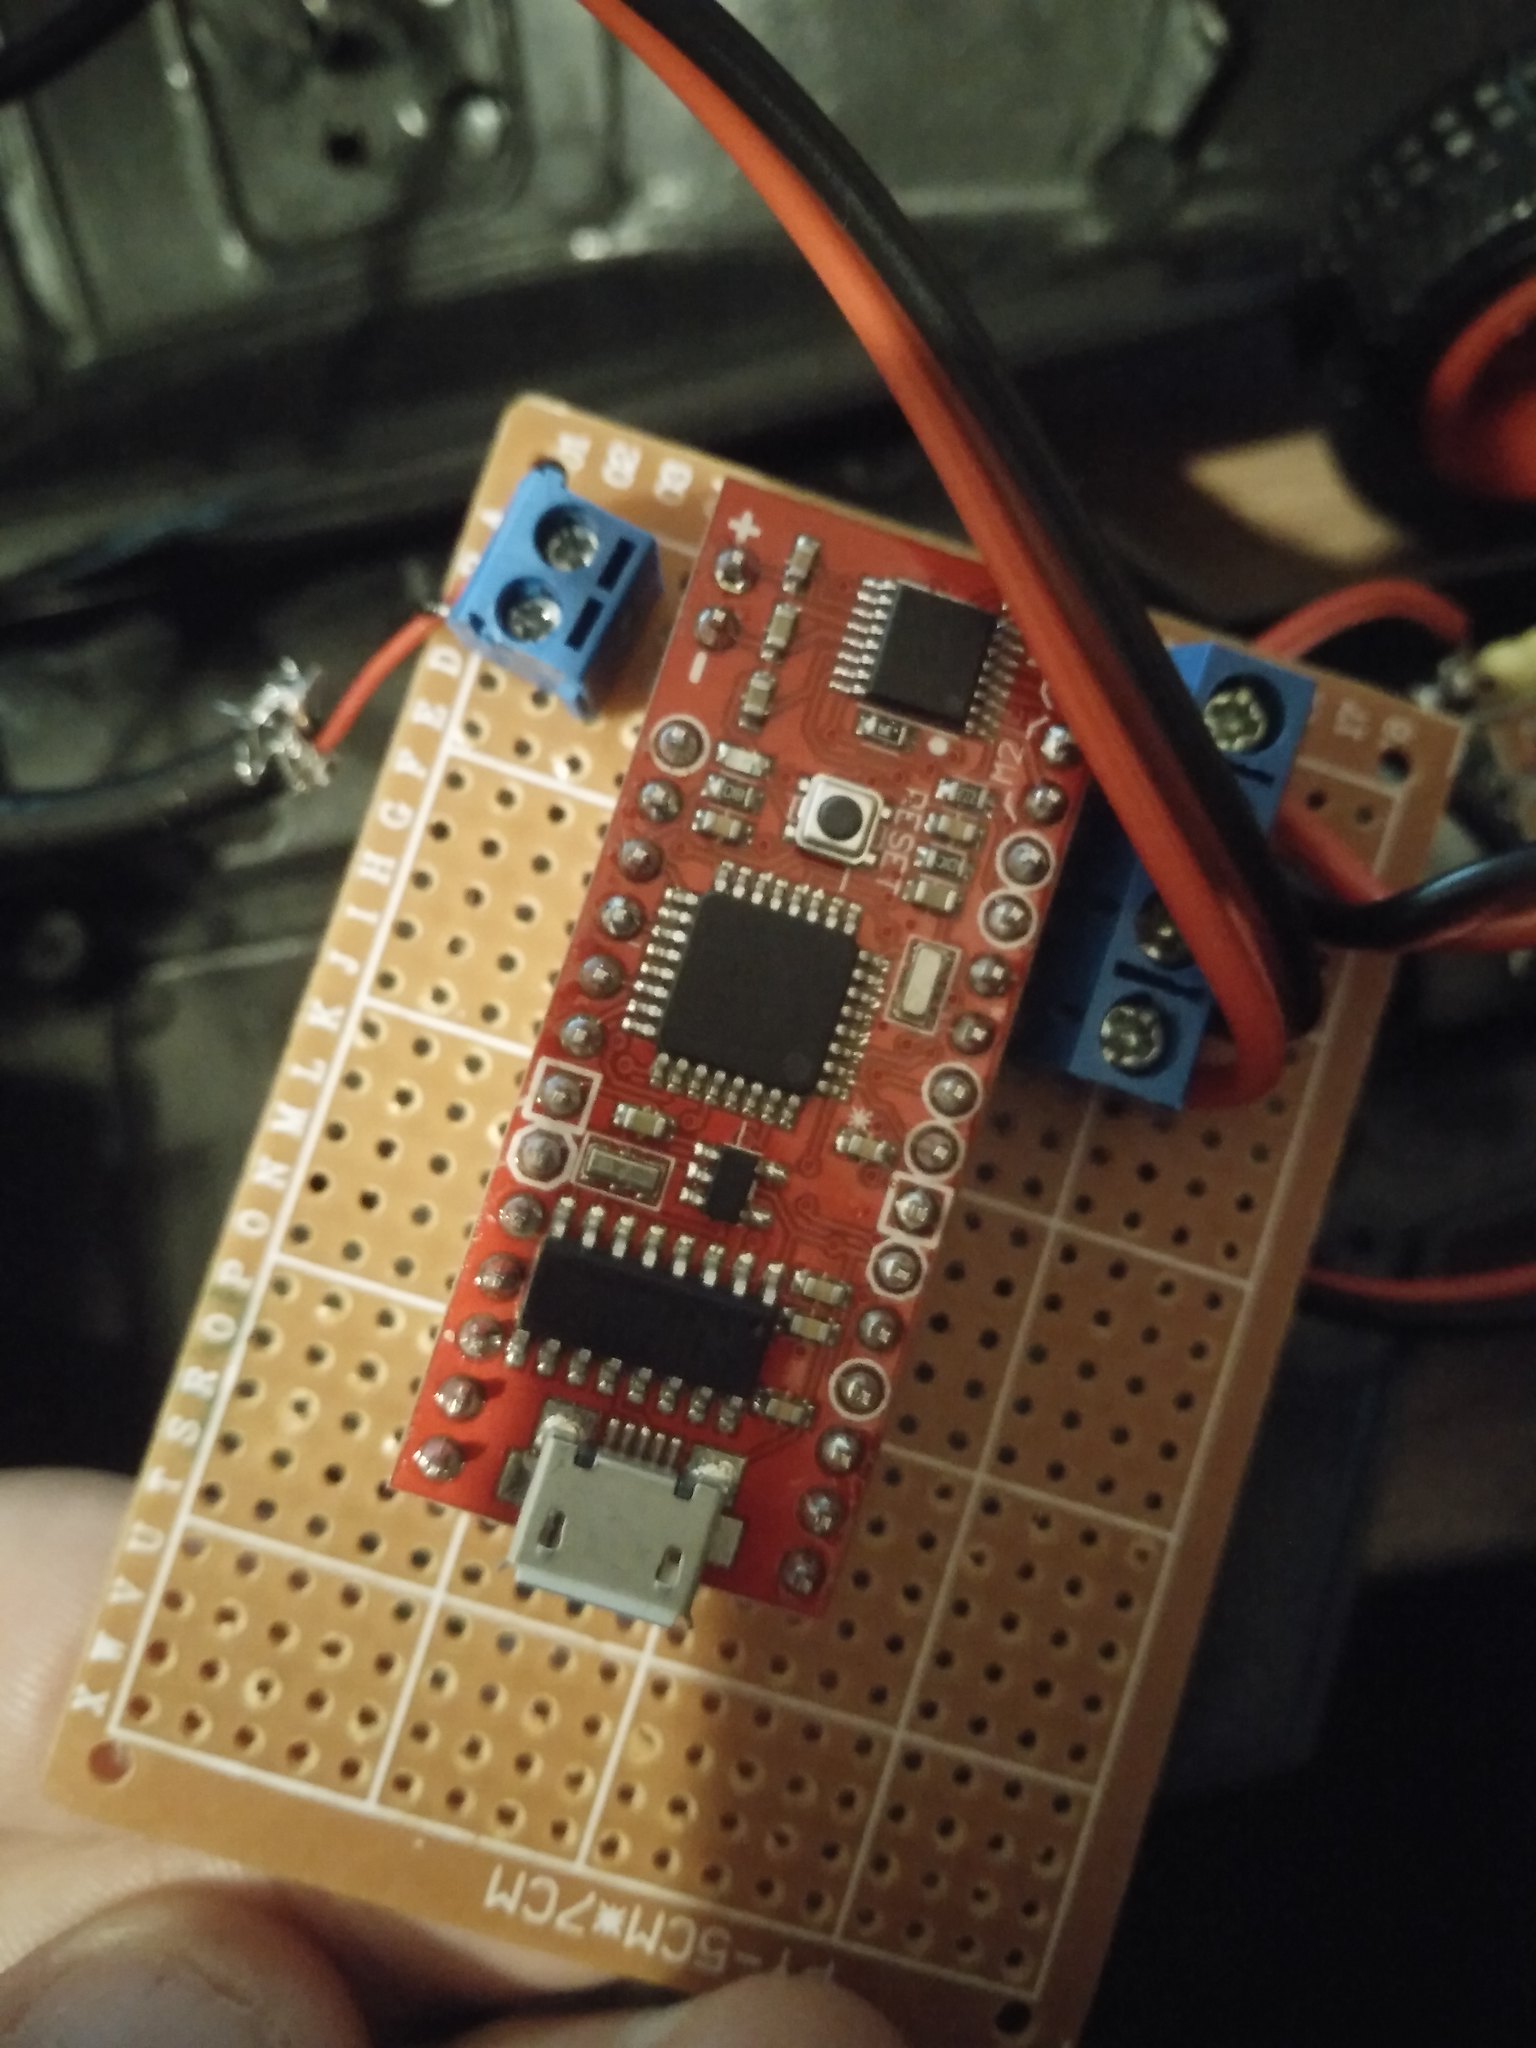
The mini Pro looks like an extended Arduino Mini / Micro board, and it fits EXACTLY on a small breadboard. It has a micro USB interface (CH340)and it is powered by an ATMega328P-AU processor. We have a built in blue LED handy for that first "blink" sketch. The motor pins are broken out for direct access (Motor 1 + - and Motor 2 + -)and there are separate power inputs for the motors...which I forgot about...doh!
The 4duino pro looks like a typical Arduino, but we can see dedicated screw terminals for the motors and motor power, we can also see a series of male header pins (GVS Ground, Voltage, Signal) which can be used with three pin connectors to quickly and safely connect compatible components. The 4duino pro shares all the same pins as the mini pro.
Hack Time!
So enough of these specs, what can we do with the boards? Well I thought long and hard and then realised...
I've never made a robot with an Arduino!
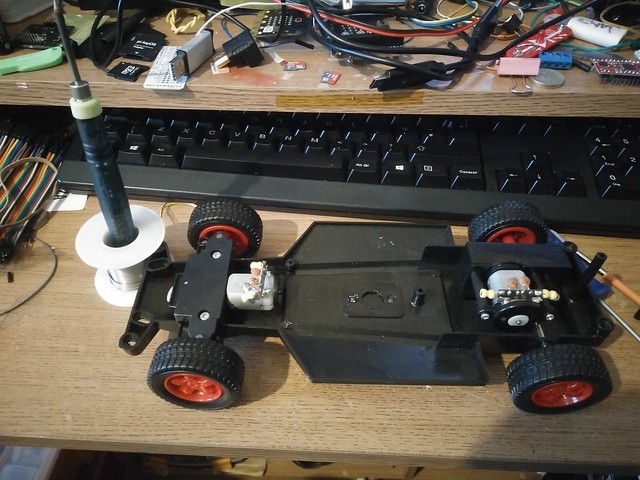
This had to change, so it did! I went to the loft and grabbed the cheap remote controlled toy card that i purchased from a charity shop in 2015 (I used it with a Codebug to make a simple robot) and then set to work on my robot.
Bill of Materials
- Remote Controlled Toy Car
- pounderland USB battery
- Spare micro USB lead
- Multi core wire (speaker cable will do)
- Stripboard
- Female header pins
- Screw Terminal
- Soldering equipment
The code for this project can be found on my GitHub page
Starting the build
Excuse the mess
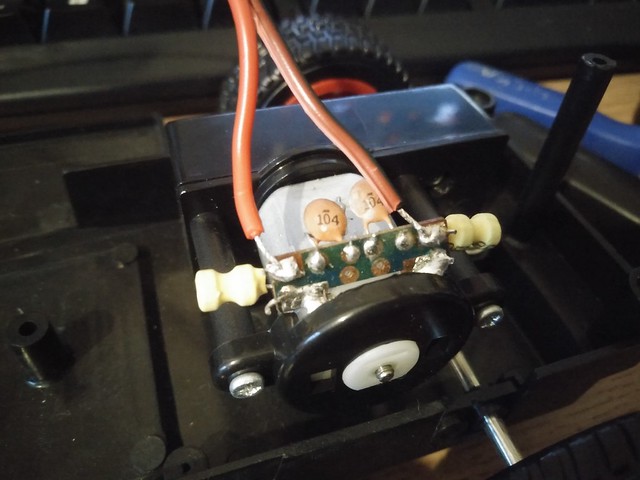
I started by soldering new wires directly to the motors of my car as the old wires were naff!.
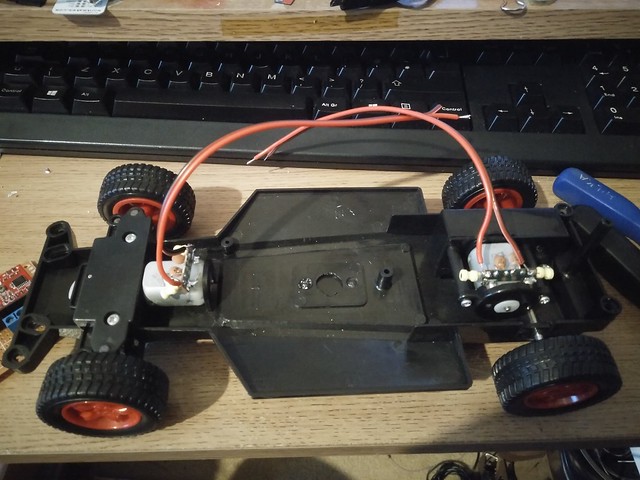
With the wires for both motors soldered I next worked out where to place the 4duino.
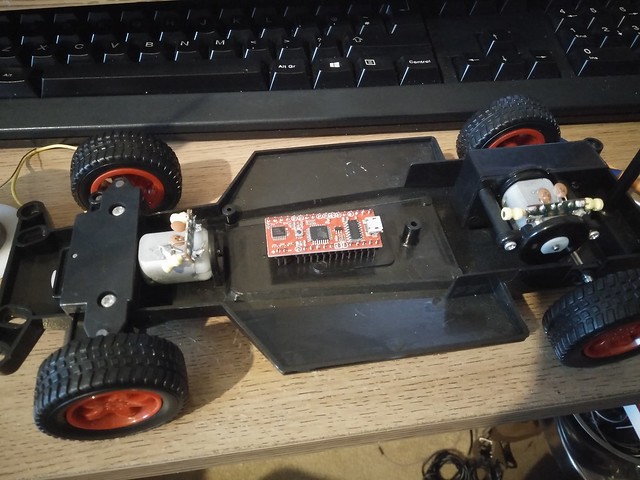
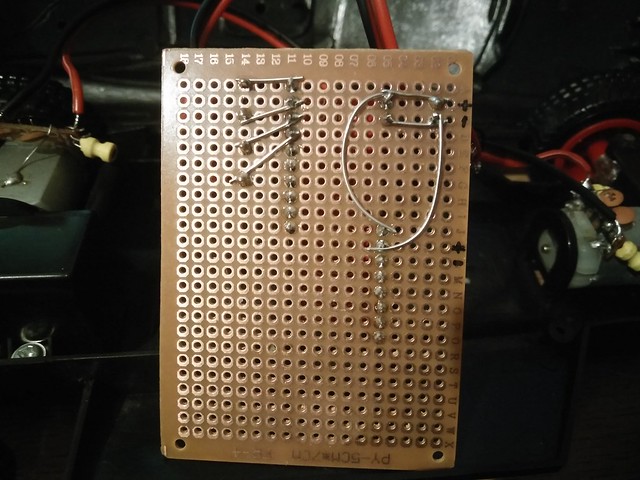
It soon became apparent that I needed to use the stripboard to create a basic circuit for the incoming power and to connect the motors using screw terminals.
Out came the soldering iron! Here we can see the terminals for the motors, which care connected securely, reducing the risk of them coming loose.
I soon realised that I need to create an input for power, that would connect my USB battery to the VIN and GND on the 4duino (bypassing the USB port and supplying power to the board) and also connect the USB battery to the motor power input pins...otherwise the motor would not work (awkward DM to Gareth confirmed that I was an idiot and he forgot to write that in the instructions). So once again the trusty soldering iron came to hand and I made a basic circuit to connect the 5V power from my USB battery to 4duino and the motors.
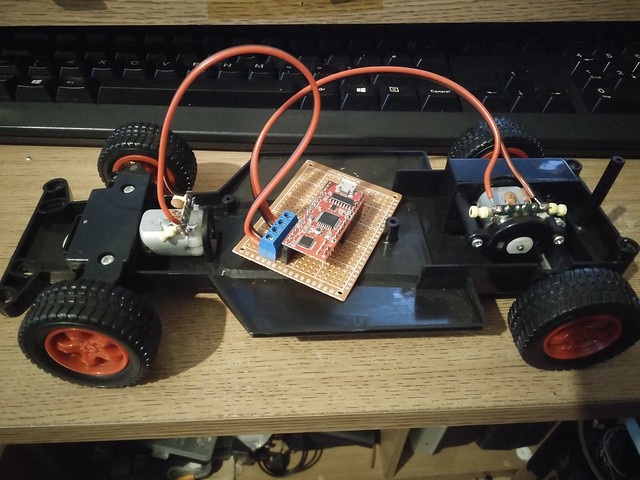
So now my 4duino and motors shared one common power source, a 5V 1A USB battery from pounderland ;)
After that it was just a few minutes of making sure the power supply was secure (I tinned the wires from the USB power supply as cheap wires are prone to breaking apart) then I secured the board to the chassis using blu tack (quick hack, I will use hot glue once completed.)
Writing the code.
So here we are, itching to code our robot car hack! So lets open the Arduino IDE and start writing!
First section of code is to setup the pins that will be used for our motors. Each pin needs to be an output.
void setup() {
// Initialise motors as outputs
  //Motor 1
  pinMode(6, OUTPUT);
  pinMode(10, OUTPUT);
  //Motor 2
  pinMode(5, OUTPUT);
  pinMode(9, OUTPUT);

}
We now move to the main loop that will continuously run on the 4duino. Lets move forward!
// the loop function runs over and over again forever
void loop() {
  //Forward
  digitalWrite(5, HIGH);
  digitalWrite(9,LOW);
  delay(3000);
Then stop!
  //STOP!!!
  digitalWrite(5, LOW);
  digitalWrite(9, LOW);
  delay(20);
Turn the steering to the right.
  //Right Turn
  digitalWrite(6, LOW);
  digitalWrite(10, HIGH);
  delay(20);
Stop the steering motor or it will stick and stall!
  //Stop the steering motor!
  digitalWrite(6, LOW);
  digitalWrite(10, LOW);
Go in reverse!
  digitalWrite(9, HIGH);
  digitalWrite(5, LOW);
  delay(3000);
Centre the steering.
  //Centre steering
  digitalWrite(6, HIGH);
  digitalWrite(10, LOW);
  delay(10);
Stop the steering motor.
  //Stop the steering motor!
  digitalWrite(6, LOW);
  digitalWrite(10, LOW);
}
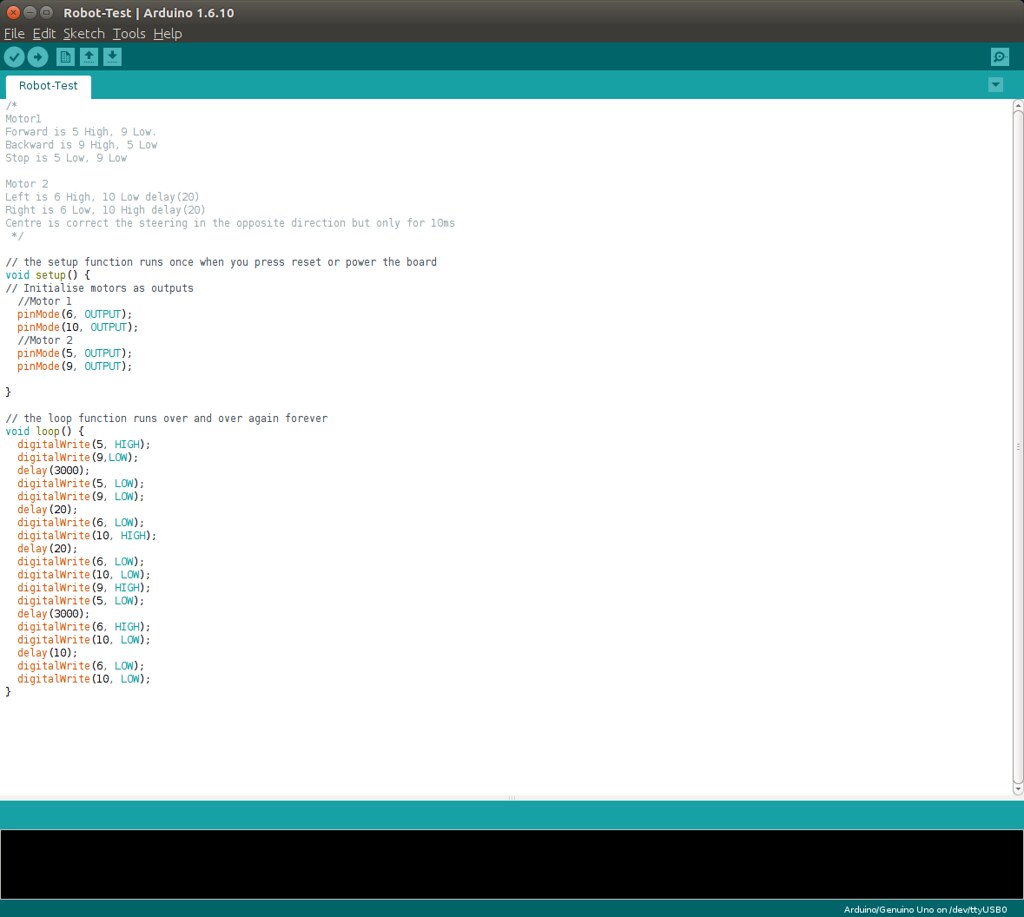
Put it all together and flash it on to the 4duino mini pro!
Now sit back and marvel at the fact...we made a cheap toy car into a programmable robot toy!
Things to do
Add an HC-SR04 sensor to make the car autonomous.
Give it a coat of paint.
Conclusion
I really do love the 4duino range. They are simple to use (they need no additional configuration, if you have installed the Arduino IDE, then you can use them). The included motor controller is a stroke of genius! They are priced really well, (£12 for the mini pro and £16 for the Uno pro) which is cheaper than an original Arduino, and better value for money in my opinion.
So if you want to build robots quickly, easily and cheaply... these are the boards you are looking for.
You can buy the boards from the 4tronix website and Gareth will most likely have a few more bits and pieces that you will need while you are there. :)