CodeBug - First steps
I love the CodeBug, it is so accessible to children but yet it provides a platform for more advanced hacking.
I was lucky to receive my CodeBug in person from Andrew Robinson and so I've been hacking on and off for a few days.
The "Hello World" of Hardware
In programming the first goal undertaken is to learn how everything works. Of course we could try something really complicated...but it will most likely go wrong and we'll spend an hour trying to debug it. So lets keep it simple and just say hello, using a nice red LED (Light Emitting Diode) and control the power flowing to it so that it flashes on and off, commonly known as binking.
For this project you will need.
- A CodeBug
- An LED any colour will do but I like red :)
- 2 x Crocodile clips
Before we start hacking the hardware lets build the software.
Coding and Software setup
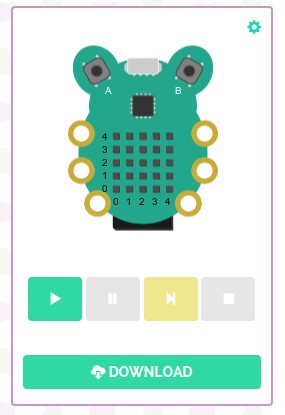
You will need to head over to the CodeBug website and look for the create button at the top left of the screen.
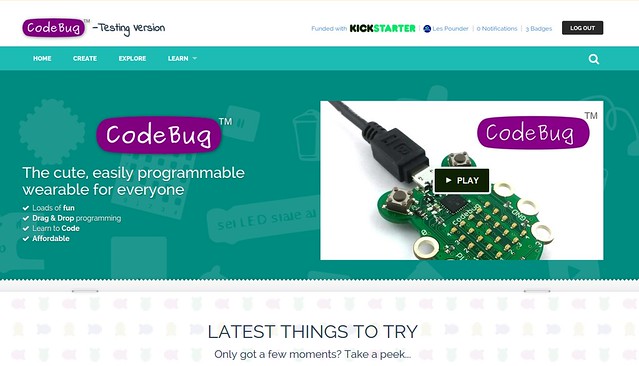
You will not need to login at this time.
The next screen that you will see if the coding environment for CodeBug, it is based on Blockly and uses blocks to represent coding concepts.
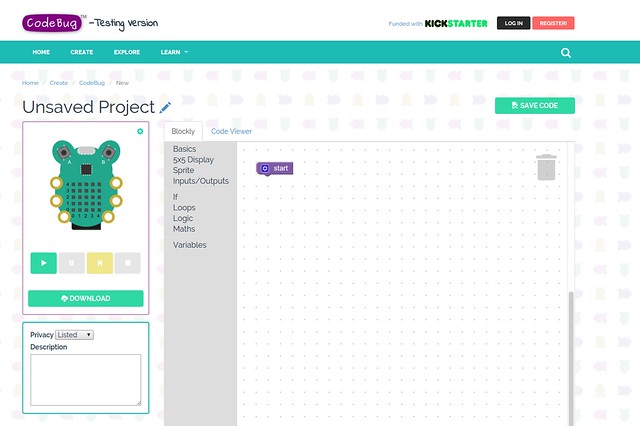
We start our coding the with purple block already in the coding area, it's called "start" and it has a cog inside of it.
Click on the cog and you will see a new menu pop up.

Drag the "leg input/output block and connect it to the start block like this.
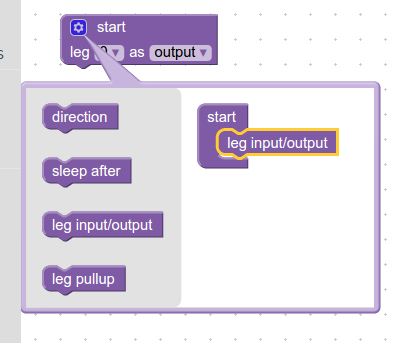
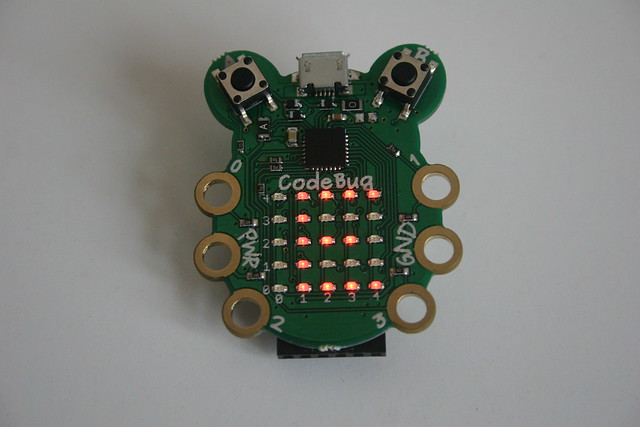
The "legs" are the rings that circle the codebug. When finished click on the cog once again to close the menu.
Change the leg value to 1 and ensure that it is an output. This means that power will flow from the leg to a component connected to it.
Lets do a little more coding. For this project we will control the power flowing to leg 1 and the code to do that is as follows.
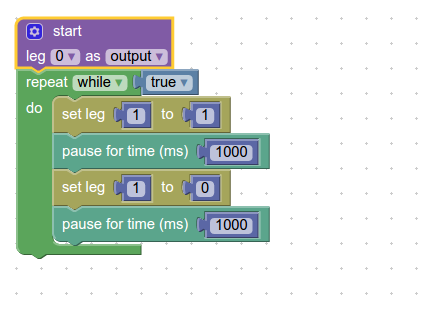
From the loops menu we use the repeat while true loop to constantly run the code...forever and ever!
The following code is inside the loop.
- To send power to the LED we need to instruct leg 1 to turn on and the value for that is 1, the number one. So we set leg 1 to 1
- We then need to instruct CodeBug to pause/wait/sleep for 1 second so that the power flows to the LED for 1 second. For that we use the pause for time (ms) block found in the basics menu.
- To turn leg 1 off we need to set leg 1 to 0
- Lastly we insert another pause so that the power is turned off for 1 second.
So that is all the code that we need to control an LED. Lets click on the download button to download the code to our computer.
This will now download a file to your download dicrectory. Now we need to copy it to our CodeBug.
Insert an Micro USB lead into your CodeBug.
Press and HOLD the A button on your CodeBug.
Insert the USB lead into your computer.
CodeBug will now appear on your screen just like a USB flash drive. Copy the downloaded file to the CodeBug drive and when ready press Button B to restart CodeBug and load your code but keep the USB lead in place as it is providing power to the CodeBug.
But nothing is happening!!!
Don't panic we'll finally add an LED to that leg.
Hardware - Building a simple circuit
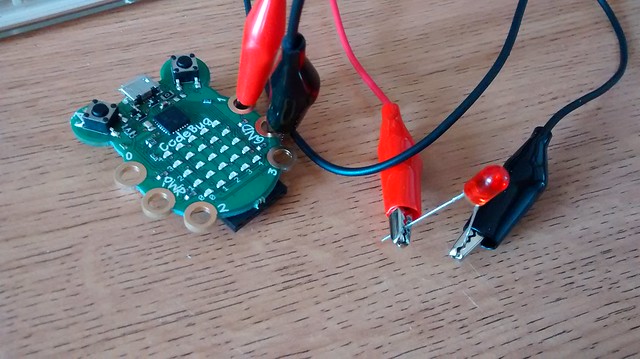
For this final part of the project we shall use the crocodile clips and the LED.
-
To leg 1 I connected a RED crocodile clip which was then connected to the long leg of the LED. This is the positive leg of the LED and is known as the anode.
-
To GND, ground, I connected the BLACK crocodile clip and attached the other end to the short leg of the LED, this is the negative/ground leg and is known as the cathode.
You should see the LED flash on and off? If not it is likely that your LED is in the wrong way round. It happens a lot even for hardened hardware hackers. Simple remove the LED from the crocodile clips and clip it in the opposite to beore and it should work fine.
So there you have it. You have taken your first steps to hacking hardware with CodeBug. Congratulations you have chosen wisely :)